It’s the third of September today and that means August is definitely finished. Which means that the latest Theme Month, the Sew Style Hero, of the Sewcialists is over.
If you want to discover all the amazing makes sewists from all over the world made to honour their personal Sew Style Hero, head over to the Sewcialists blog. I’m super excited that I could write the round-up of this theme.
My personal Sew Style Hero is Becky from ‘I Sew Therefore I Am‘. I love her Kabuki Tee so much that I just had to sew one myself. I featured her version in my last Eye-catchers.
An eye-catcher is a person or a thing that attracts the attention
The online sewing community is very visual. So, every day I see heaps of sewing related images on social media and blogs. Some of them catch my eye because they make me think or they give me inspiration. Here, I want to share these eye-catchers with you.
Follow below what caught my eye the last months:
Tiina’s Japanese Dress
Thanks to the fun summer photo challenge #sewingagogo I discovered this beautiful dress made by Tiina. It’s a pattern from the Japanese sewing magazine Cotton Friend. I was immediately attracted by the sharp design of the front. The instructions are only in Japanese but apparently well illustrated. So far I’ve neversewed a Japanese pattern but this dress really inspires me to give it a try.
The Frances top from @maxantonia
The simple line of the design of this top combined with the remarkable finish of the sleeves immediately caught my attention. I love this version by @maxantonia in blush pink cupro. Also, this Frances top is a free pattern from Fibre Mood, a new pattern book/magazine company. Once you register you can download it and more, the instructions are available in 4 languages (Dutch, French, English & German). When I searched through the site some more I discovered Fibre Mood is stationed in my town. It’s always great to discover some sewing souls in the neighbourhood.
Beck’s Kabuki Tee
When you don’t have enough fabric but you’ve got your mind set on using this specific fabric for the pattern you want to sew; you have to go right to the limit. That is what Beck did with the Kabuki Tee from Paper Theory. The result is stunning and totally my thing. The way Beck placed the fabric accentuates the absolute crisp design of the Kabuki Tee. Look at these square shoulders! I was so in awe that I immediately started sewing a Kabuki Tee myself and designated Beck as my Sew Style Hero.
The Kobe top made by @katilulemakes
When you look at the front of the Kobe top from Papercut patterns you may think it’s a classic top, but the back gives away the unexpected and stunning design. I was instantly taken by this version by @katilulemakes. A perfect combination of fabric and pattern! Maybe I could still make one for these warm fall days that are coming…
@sewingblue’s sewing
@sewingblue is a Swedish sewist who I admire tremendously. She has great sewing skills and everytime she posts on Instagram I am totally in awe. So I was not surprised when I read the capture of this photo that it told the story of a great—and yet new for me—sewing technique. It’s about a clear finish on the inside. She uses a seam allowance of 2,5 cm. After stitching the seams the seam allowance is folden and then stitched to the body about 1 cm from the seam. You will see the stitching on the bodice but this gives also a neat effect. Hats off for this kind of sewing!
Well, I wasn’t going to sew a new Ogden Cami this summer; I sewed already three versions (cami, maxi dress & dress) last summer. I even didn’t bring the pattern with me to our holiday house. Then I went home for four days to celebrate my mother’s 80th birthday and—never not sewing—started sewing the presents for a sweet little girl that was just born. In my search through my fabric collection for suitable fabric for the baby, I stumbled on this piece of magenta leftover. I don’t know what its origin is, or its composition because I must have had it for more than 25 years. When I held the fabric in my hands it said: “I’m perfect for an Ogden Cami!” And so another Ogden Cami jumped to the pole position of my sewing queue. I grabbed the pattern and put it with the fabric in my luggage back to Italy. This was going to be a sew for maximum 3 hours, I thought. Man, was I wrong!
The magenta fabric
Like I said above: I don’t know the origin and the composition of this fabric. I found two pieces in my collection: one small part with cutouts from a small waistband and a bigger part of 65 cm on a width of 114cm. The fabric has a medium weight and some drape. Perfect for an Ogden Cami!
The sewing struggle
Struggle #1 Not enough fabric
When I decided to make the Ogden Cami I roughly put the pattern on the fabric and thought I could fit it. Alas, after trying several placements I had to admit that the piece wasn’t big enough.
But no worries! I had a good experience with the self-made striped lining for my Jill Coat so I could expand the fabric with some fabric straps. When I browsed my bags of fabric I saw the leftovers of my sheer Venus Kimono. The selvedge of this fabric has these strange stripes which I found perfect.
My work order to expand fabric
Cut out the back piece as economical as possible.
Cut the remaining piece of fabric in two.
Assemble all the fabric pieces together to make one strap. Here I made a mistake to match the top of the first strap with the lowest point of the neckline. When I did a test placement of the pattern I noticed that because of that I had not enough fabric for the hem. I tried to unpick the strip but I used a small zigzag stitch to prevent fraying. Needless to say that trying to unpick was hopeless.
Make a patchwork with small scraps so you have a perfect rectangle.
Stitch the strap to both sides of the line you cut. Cut out the front bodice. Tadaa!
Struggle #2 The bias binding
As I squeezed the bodice out of the small amount of fabric I had, you can imagine there was absolutely nothing left for the lining. No worries! I’ll finish the neckline and armholes with self-made bias tape! That would be easy, because I had my bias tape maker with me. I succeeded in cutting out two squares of 14 cm of the magenta fabric and one square of 15 cm of the sheer fabric. Of course, I wanted the bias tape to match with the fabric of the bodice.
Although I’ve made continuous bias tape before, I struggled a lot with these small pieces and I just didn’t see how I had to make the loop. Also, due to their fluidity and devilish character both fabrics were very difficult to put marks on. So I made a sample in tissue paper and then the light went on.
Sewing the first line of the bias tape on the bodice went smoothly. For finishing the v-neck with bias binding I used the little dart technique that I learned sewing my Chari Dress.
The second part of the bias binding finish, the fold over, was hell! Because of the small squares of fabric I used there were a lot of tiny seams in the bias tape. And again, these fabrics—although starched— wouldn’t let themselves fold. So I basted the more tricky parts. This made it easier to sew the folded over bias tape.
Then finally I could hem the bodice. I couldn’t believe that this Ogden Cami was finished. It was a 4-days journey!
Conclusion
Am I happy with my Magenta Ogden Cami? You may think I am not but I am! Since I finished it I wore it non-stop and I love wearing it. Just like my other Ogdens, this is a perfect wear for these hot days. Will I sew more Ogden Camis? I guess the answer is no but you’ll never know when I find another piece of fabric that talks me into it!
On an afternoon a few months ago my daughter and I were browsing the internet in search of a dress pattern that she would love. We came across the Zéphyr dress from Deer&Doe and my daughter immediately liked the design of it. Because of a fitted bodice, a v-neck, a loose-fitting skirt and a sexy vibe, it ticked all of her boxes. When I saw the pattern was designed for knits I said to my daughter: “If we make it out of the Black Red Buffalo Plaid we have then it is a statement dress!” As we both are never shy about making a statement we went for it and we are both super excited about it!
The Zéphyr Dress pattern
The Zéphyr Dress pattern from Deer&Doe, version B, consists of 7 pieces. Based on the finished garment measurements in the instructions, I cut out the biggest size. I found it a pity though that in the English instructions the measurements are only in inches as I’m using the metric system. After conversion, I noticed I had to expand the waist with 16 cm. First, I divided this width evenly on the waist hem of every piece of the bodice and graded to the bust or arm. Second, I broadened the skirt pattern by 4 cm in the middle of the pattern.
Further, I lengthened the bodice with 1 cm and the skirt with 5 cm. That was the maximum the length of my fabric allowed. All of the adjustments were perfect!
Perfect body length, perfect skirt length and perfect fit of the waist! And look at that pattern matching at the centre of the bodice and the skirt!
The Black Red Buffalo Plaid fabric
The Black Red Buffalo Plaid fabric is a cotton spandex knit from Girl Charlee. My daughter chose it a few months ago because she wanted some garment of plaid. It’s a nice fabric to work with. It has some body, good recovery, and the needed 40% elasticity.
Though two things made the cutting of the pattern a little tricky, being a knit fabric and the lines of the plaid. I solved this by cutting open, with a single layer of fabric. It’s the same technique I used for my striped Nanöo Top.
Cutting open in a single layer of fabric.
I’m using the already cut pattern piece of the skirt to cut out the second. The slightly visible black lines on the back of the fabric help to make the pattern match.
One of the perks of this black red plaid is that you can create chevrons! The fabric asks for a single layer cutting so you can place your pattern pieces meticulous to make these chevrons.
The sewing process
The Zephyr Dress comes together easily. Deer&Doe wrote clear instructions with crisp designs. Though I didn’t follow them for 100%.
As my daughter was going to fit the bodice several times I first staystitched the neckline to prevent stretching. I didn’t make a muslin but I basted, with a large stitch on the sewing machine, the bodice with an extra 1 cm seam allowance on al the seams. I once read this and remembered it as a tip for sewing for curvy women. Probably it was a tip from Jenny from Cashmerette.
After the first fit, it was clear that the extra seam allowance was not necessary. So I finished the bodice on my overlocker using a 2 cm seam allowance and rainbow thread!
The neckline is staystitched and I reinforced the v-neck with some lightweight interface.
Because a single bodice is easier to handle than a complete dress I first sewed the armholes and the neckline. For the armhole and neck binding, I used some of the extra red fabric that was on the selvedge side. It was my first v-neckline in a knit fabric and therefore the instructions of Deer&Doe were not extensive enough. So I searched on the web and found a good tutorial from Grainline Studio and it worked out fine!
The last thing to do was matching the skirt with the bodice and tadaa! The statement dress was ready!
Conclusion
Do I still have to say that we are over the moon with this Zéphyr Dress? I think the pictures speak for themselves. Will I sew more Zéphyr Dresses? I probably will. I’m so glad I could adjust this pattern for a perfect fit that I absolutely want to sew it again.
Bonus!
It is totally a coincidence that the three patterns from Deer&Doe I sewed so far are all red!
I have been nominated by the lovely Diane, from Dream. Cut. Sew, for The Mystery Blogger Award. As she is a sweet lady and an inspiring sewist and blogger I’m thrilled to join in. Thank you, Diane, for the nomination.
The Mystery Blogger Award: how does it work?
“Mystery Blogger Award is an award for amazing bloggers with ingenious posts. Their blog not only captivates; it inspires and motivates. They are one of the best out there, and they deserve every recognition they get. This award is also for bloggers who find fun and inspiration in blogging, and they do it with so much love and passion.” Created by: Okoto Enigma
The rules are as follows:
Thank whoever nominated you and include a link to their blog.
Tell your readers three things about yourself.
Answer the questions from the person who nominated you.
Nominate 10 – 20 bloggers you feel deserve the award.
Ask your nominees 5 questions of your choice, with one weird or funny one.
Notify your nominees by commenting on their blog.
Three random facts about myself
FACT ONE
In August I’m going to be a grandmother, of a little boy, for the first time. I’m so looking forward to this, you can’t imagine. Also, this will give me a reason to sew all of the cute baby clothes.
FACT TWO
My husband and I met in 1979 behind the dishwasher at the student restaurant where we both had a student job. Two months after that moment we kissed for the first time and we still do.
FACT THREE
I hate doing sports because I have a.b.s.o.l.u.t.e.l.y no talent for it. I once was a goalkeeper for a benefit football game with the youth movement of which I was a member. We lost with 0-20! And I made one of the goals.
Diane’s Questions for me
Do you have a bad habit and if so what is it?
Procrastination, I guess.
If money was no object, where would you fly to in the whole world?
Seychelles!
What food do you hate?
Warm red cabbage! This is a real childhood trauma.
How many sewing machines/overlockers have you got?
I have a 38-year old orange Toyota, a 2-year old Brother and a 1,5-year old Juki overlocker.
Name 3 famous people you would love to share a dinner table with.
Tilda Swinton, Frida Kahlo & Nick Cave.
On 25 Juli 2015, I posted my first Instagram photo and today—almost three years later— I posted my 1000th. Say what? Yes, I posted 1000 photos on Instagram! Just like when I reached 1000 followers, I find it difficult to comprehend what this number means. But I love the interaction and sharing of photos and experiences with this wonderful online sewing community.
Below I share with you my 5 most liked and my 5 most commented on photos, ever! I go to Squarelovin to get this information. And my most used tag is #isew! No surprise here, I guess.
First post on July 25th 2015Reenactment of the first post aka post 1000!
Top 5 of my most liked photos
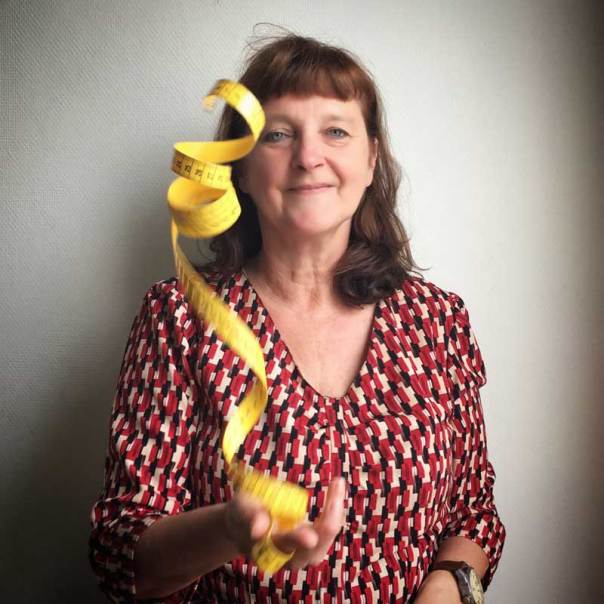
#5 The measurement tape!
I posted this photo for Day 1 of #sewphotohop September 2017: Intro! I thought it would be nice to show a typical sewist’s attribute for the introduction photo of this challenge.
It took a lot of practice to throw the measurement tape; even my husband had to demonstrate it!
#4 The Vogue 9075 Jumpsuit
This photo is taken, and posted, on 25 May 2018 at the South wing of the Sint-Baafs Cathedral in Ghent. We were on our way to the official celebration of the diamond wedding anniversary of my parents-in-law. I justed finished this jumpsuit and wanted to show it off!
#3 The DKNY V1349 Dress
I took these photos for #mmmay17 but I made this collage, and posted it, for the ‘Curvylicious’ theme of #sewapril2018. I made this dress two years ago from a vintage curtain. There were some serious fitting issues (gaping armholes) the first time I tried it on but at the end I made it work. I love wearing it!
#2 The African Wax Selvedge Statement Sleeve!
Posted on Instagram on 10 April 2017 as an entry for #sewapril2018 for the ‘Statement Sleeves’ theme. I took the photo in August 2017, when I was working on the Laneway Dress. I love this African Wax selvedge and that’s why I use it as a natural hem!
#1 Sewing at Podere Santa Pia
This is my most liked photo on Instagram ever! My husband took it at our holiday home, Podere Santa Pia. I remember it took only a minute to make the photo. I posted it on 1 April 2017 for the last week of #dressmakers52: Happy place. “When I am behind my sewing machine I am in my happy place. But when I am behind my sewing machine at our holiday house I am in my happy happy place.”
Top 5 of my most commented photos
#5 Memories
A photo from 1986, I was heavily pregnant with my firstborn. I’m wearing my self-made bathrobe and nightdress. I posted the photo on Instagram on 15 November 2016 for the Memories prompt from #bpsewvember.
I only posted this photo two days ago, 10 July 2018 for my 58th birthday. Thank you for all your birthday wishes.
#1 A photo for my 57th birthday
This photo was taken on my 20th birthday in 1980. I posted it on 10 July 2017 for my 57th birthday. I loved that I got a lot of birthday wishes even if I was knitting, not sewing. The sewing community is the best!
1000 photo posts on Instagram!
Thanks for all the love and comments, here’s to 1000 more Instagram photo’s!
When I restyled a summer dress to a kimono a few weeks ago I absolutely wanted to sew one for myself. I already had the perfect fabric in mind for it. Then I went to the market in Castel del Piano and I found some nice remnant pieces of fabric at my favourite stall. One of them eminently suitable for a kimono. So the only thing to do was to sew two Venus Kimonos in two days!
Venus Kimono #1 in African Wax Cotton
I got this fabulous—but impossible to photograph—piece of African Wax as a present from my sister-in-law. I don’t know where it came from or what its origin is but it has some vintage vibe. The piece was 1,80 m by 1,40 width. I was intrigued by the design and I wanted to use as much of it as possible.
Therefore I placed the shoulders of the front and back in the middle of the fabric and lengthened both the front and the back, until the borders. Just like the restyled kimono, I made before, I put the back at the centrefold, after folding over the seam allowance of 12 mm.
The front pattern was too big for the width of the fabric so I cut off 21 cm at the arms and placed these pieces at the selvedge. This gave me more of the fabric design on my kimono and the selvedge didn’t need hemming!
The back of the kimono with the beautiful design.The front with the design in the middle and the borders on the sleeves.
Venus Kimono #2 in sheer flower fabric
When I touched this fabric at the market I knew immediately it would be perfect for a kimono: light, fluid and drapey. The only problem with this kind of fabric is that it is devilish to work with.
So, I treated it with starch to make it easier to cut and sew. And it worked! I didn’t have a single problem.
A small pattern hack
The sheer fabric was 1,65 m on a 1,50 with. I wanted a longer kimono so I lengthed the front and the back at the side seams with 35 cm and redrafted the hem.
The lengthened kimono.
The Sewing Proces
It’s not difficult to sew the Venus Kimono. Annie, from Sew This Pattern, has a detailed sew-along on her website with clear instructions and pictures.
The next three steps made it even easier for me.
#1 The 1/4 inch presser foot
For me, a 1/4 inch presser foot is an unmissable guide for sewing french seams. Here you see that I use some tissue paper for the start of a seam of fragile fabric.
#2 A stitched line to prepare the rolled hem
This I do slightly different than shown in the sew-along. I stitch a line 1/4 inch from the edge of the hem.
Then I fold the fabric on the stitched line and press. Next, I fold the fabric again 1/4 inch and sew the hem at 1/4 inch. Here again, the 1/4 inch presser foot is unmissable.
#3 Basting the curves of the rolled hem
With my first Venus Kimono, I had trouble with the rolled hem at the neckline so I finished it with bias tape. For these two kimonos, I followed Annie’s advice and basted the curved neckline. And I learned that basting isn’t slowing your sewing process but in fact skilling it up.
Conclusion
Do I love my new Venus Kimonos? I do! Do I have a favourite? No, I don’t. It’s difficult to choose one because both are different in style and in how they feel. Will I sew more Venus Kimonos? Not in the near future but you all know: never say never!
P.S. All the time when I was sewing these Venus Kimonos I was singing Venus from Shocking blue. This song is a huge teenage memory. The strangest thing is, that when you look at the video, Mariska Veeres is wearing some kind of Kimono.
Exactly today 10 years ago we bought a holiday house—Podere Santa Pia—in the south of Tuscany, the Maremma. No need to say that this is our heaven on earth and we don’t regret this investment for one second! Of course, we try to go there as much as my school schedule allows. My husband is self-employed and can take his work with him wherever he goes. So, we are staying here for at least 8 weeks during the long summer break. This also means that I have to organise 8 weeks of sewing in advance. How can that be done? Below, you can read the story of a summer of sewing at Podere Santa Pia.
What do I bring with me?
1. My sewing machines
Ten years ago I was in a non-sewing-period and my sewing machine was gathering dust somewhere back in the attic. So, when we bought Podere Santa Pia there was no urgent need for a sewing space there. This changed in September 2013, when I started sewing again and enjoyed it so much that I wanted to sew all the time. Including when on holiday; maybe especially when I was on holiday because then I had time for it. That’s why I brought my trusted Toyota sewing machine and some projects with me. The start of a new tradition.
July 2014, first time sewing on the terrace of Podere Santa Pia. I’m sewing a swimsuit.
It’s 1444 km between our two houses and it takes about 16 hours to drive there. Luckily, our car has a huge boot to take all my sewing luggage with me.
After buying a new sewing machine on Easter 2015, I left my Toyota sewing machine permanently at Podere Santa Pia. This is handy for when we come by plane. We fly when we have a short break. Then I only bring with my special sewing feet: the walking foot and 1/4 inch foot. I didn’t research it when I bought a new machine but my two sewing machines have the same foot mechanism. Very handy.
I still bring my overlocker though. Especial this summer as I want to sew a lot of knit projects.
The sewing machines on the desk I use as a sewing table.The sewing luggage: my overlocker, baskets and bags with fabric, a box of WIPs, a roll of A0 printed pdf patterns and a bag of sewing notions.
2. Sewing materials
Of course, you need more than a sewing machine to sew. So a few days before we leave I make a list of all the projects I want to sew and I make a list of all the materials I need: fabric, zippers, lining, interfacing, buttons, etc… It is necessary that I bring this all with me because there are no specialised sewing shops in the neighbourhood. Podere Santa Pia is situated in a quiet and rural area and the nearest small sewing shop is in Castel del Piano, about 30 minutes away. In this village, there is also a monthly market with a fabric and haberdashery stall. Luckily this exists, because last year I had not brought enough fabric for the Laminaria Swimsuit and I found suitable fabric at this market.
Selecting fabric at the market in Castel del Piano.Cute haberdashery stall at the market at Castel del PianoThe drawer with notions and supplies I collected last 3 years.
What do I want to sew this summer?
1. Finish some WIPs!
First of all, I want to finish some WIPs. I have several projects I started last year, or even before that, but didn’t finish.
Boxers for my sons and husband.
It’s the Jalie 2326 pattern. All of them are cut out, most of the side seams and flies are sewed. They just need hemming and elastic put in.
The Highlands Wrap Dress
Oops, this was supposed to be my entry for #sewtogetherforsummer this year. Again I didn’t make the deadline. I cut out all the pieces—and there were a lot—I just have to sew it together!
We are expecting two new babies in our family this summer and one of them is going to be our first grandson. So I brought with me some cute fabric to sew some presents for these little ones.
New garments
Starting at the top:
– African wax for a Venus Kimono for myself.
– African wax for a second V9075 Jumpsuit.
– Black linen for comfy trousers for my husband.
– Polka dots for the Dartmouth Top for my daughter.
– Red & Black plaid for the Zéphyr Dress from Deer&Doe for my daughter.
Testing a sweater pattern
I had to bring several medium heavy knits to test a sweater pattern. I can’t tell you more at this moment.
2018MakeNine
I also brought the patterns and fabric with me for two items of my 2018MakeNine: the Jenna cardi and the Watson bra. In fact, they were on my 2016 and 2017MakeNine too. Will I sew them this summer?
The Ellsworth Coat
At the end of the summer, I want to start on the Ellsworth Coat from Christine Haynes. I have the pattern, in A0 format, and I have this beautiful, red, vintage, heavy cotton. This coat is also on my 2018MakeNine.
Conclusion
So this is how I sew during the summer at our holiday house, Podere Santa Pia. What do you think of my sewing plans? A little too ambitious? I will let you know at the end of August!
When Amy and Pilar launched the second annual restyling exchange I was very excited. Last year, my first restyling project was such a fun and challenging project that I didn’t hesitate signing on again.
What is the annual restyling exchange? In short, you get a garment from someone to restyle and you send a garment to someone to restyle! So I received this summer dress from Rebecca and restyled it into a kimono.
Restyling a summer dress in a kimono.
Restyling: the start
When I opened the package that I received from Rebecca I was pleasantly surprised that it contained this bright summer dress with the floral embroidery. It was still new, barely worn, and it had gathered skirts. So I had a significant piece of fabric for my restyling project but not an idea yet. Initially, I wanted to go for the Kastrup top again because that pattern has several smaller pattern pieces. More, I could play with the placement of the embroidered border, which is something I like a lot. It was not until Diane, from ‘Dream. Cut. Sew.‘, posted her kimono made out of two scarfs that I had a lightbulb moment. I could restyle this dress in a kimono. I even had already the Venus Kimono pattern from ‘Sew This Pattern‘, so no extra costs were made for this challenge!
The Venus Kimono pattern
The Venus Kimono consists of 2 pattern pieces: the front and the back piece. I had the pattern already printed on A0 format so that was a huge timesaver. Although this kimono comes as a one size pattern with a relaxed fit you want to check the finished measurements. For Rebecca, the Venus kimono would have been far too big the way it is designed. So I shortened it with 14 cm and took about 1,5 cm off from the center front. These alterations were also necessary to make the pattern fit on the fabric I had available. I traced the customized pattern on to tissue paper because I wanted to keep the original pattern for a future kimono for myself.
Restyle: fitting the pattern on the dress
The first thing you do when you begin your recycle project is unpicking the seams. I started with the gathered skirt because this would give me the biggest fabric pieces. I also unpicked the hems as I needed every mm of fabric I could get. It takes a while to unpick all the overlocked seams and I was a surprised how much thread it gave.
After unpicking I gave the big pieces a good press to smooth the gathers. Then the most challenging part started, the pattern Tetris!
I put the pattern piece of the back, center back to fold line, on the front piece of the skirt. The pattern is designed with a center back seam but I cut off the 1,5 cm seam allowance. The arms were not covered but I marked this on the tissue paper and cut the pattern on this line. Also, you can see that the curve of the hem did not fit; so I adjusted that later when I hemmed it.
The front piece of the pattern went on the back piece of the skirt. Here, the length of piece fitted but for the arm, I had again to make a mark and cut the pattern piece.
To cut out the rest of the arm I lengthed the back and the front piece with other fabric fragments. Herefore I unpicked the bodice of the dress; also the shoulder straps.
Lengthen the front piece with the unpicked shoulder straps.
After lengthening the front piece with two fragment pieces of fabric the arm I was able to cut the arm piece of the front.
For the back, I worked the same way. First, I lengthened the pattern with fragments of the dress bodice. Here I kept the side seams of the bodice.
Then I put the pattern piece of the arm on the assembled fabric. You will notice that it didn’t fit totally. As I didn’t have any substantial piece of fabric anymore I shortened the front piece to make it match.
The assembled front piece with the shoulder straps and fragments of the bodice.Finished back sleeves.
The sewing process
After putting together the pieces of the kimono, sewing it was a piece of cake. Annie, from Sew this Pattern, has a very good sewalong on the website with clear instructions and pictures.
For the french seams, I used my 1/4 inch foot to have a guide and this helped a lot.
I finished the back neck line with bias binding because that is easier than a rolled hem.
Conclusion
I am super satisfied with this restyle project. It gave me a taste for more. I loved sewing a kimono, my first ever, and that also gave me a taste for more.
Thank you Amy and Pilar, for organizing this great challenge.
F I N A L L Y!
Finally, I finished my V9075 jumpsuit. Ever since I saw Beth’s, from SewDIY, linen version of this jumpsuit I wanted to make one for myself. That was in November 2015! After that I was I was always fascinated when I saw some V9075 jumpsuits on sewing blogs and social media. I even featured some in my eye-catchers posts, including Rachel’s and Alex’s versions. Last March 2017 I bought the pattern with a discount online and even though I had some suitable fabric in my stash I didn’t start sewing it.
Until, right before the Easter break, I had this sudden vision of using this charcoal fabric from my collection and I went for it. Needless to say that I am over the moon that I finally finished the V9075 jumpsuit!!
The V9075 jumpsuit pattern
Why am I so drawn to this pattern? Well, it ticks several of my favourite boxes: a jumpsuit, princess seams, pleats, culottes with very wide legs, and pockets. Did I mention the wide legs?
This is the third Voguepattern I sewed and now I’m familiar with this company pattern specifics. I know that the finished garment measures are indicated on the pattern pieces and this is very handy. Based on this finished measurements I cut out a 20 at the arm and bust and graded to a 22 at the waist and hips. To fit my belly I graded a bit at the princess seams and narrowed the pleats. This after I lengthened the body with 2,5 cm and the crotch with 4,5 cm.
Grading at the side and the princess seams.
Narrowing the pleats.
To be sure that the jumpsuit would fit I made a muslin. I didn’t want to end with any form of cameltoe! The lengthening was okay, I could raise my arms and didn’t feel uncomfortable sitting down.
The bodice was a little too wide under the arms but that was easy to modify.
The fabric
I used this cotton and silk blend I bought at Goldhawk Road in April 2017. It was the end of a bolt, with a separate piece attached. That made that I had more than 3 meters for a ‘good price’ like the seller said! I never sewed with this type of fabric before but it went smoothly.
The silk gives it a faint shine and the cotton some rigidity, which I like for this silhouette. Also, this fabric has a great wrinkle recovery. On the pictures here in this post, you see how the fabric behaves after I wore the jumpsuit for a day. I cycled, I had lunch, I sat at my desk to write reports, and I had a walk.
The sewing process
On the pattern cover, you read that this is a very easy sew. And it is! It only takes much time because there are a lot of seams and these legs are very long and very wide! In my case, the side seams of the legs are 90 cm and the hem of one leg is 137 cm.
The instructions asked for lining the bodice but I didn’t do it because the fabric is rather heavy. Also because I didn’t have suitable lining when I sewed this jumpsuit in our holiday house in Italy. Instead, I finished the neckline with a facing. Next time I will probably use a
bias binding finish.
The not so blind zipper! The neckline finish with facing and rainbow overlock thread!
The only thing I struggled with was the blind zipper. Again, being in Italy in the countryside, I had only access to a small haberdashery shop. I needed a blind zipper of 65 cm long, although I had a smaller one with me to show, the one I bought was not a proper blind zipper. The first tape went in easy, using my blind zipper foot, but the second tape was horror. The stitches were to close to the teeth so the fabric got caught in the puller. Aargh!! I had to redo it several times and ended with some hand stitching. So it is not perfect but good enough for me.
Conclusion
I am sew excited about my V9075 jumpsuit that I can’t hide it. I love, love wearing it. You have to do some arm exercises to get the zipper open but after a few times, you handle that like a pro.
Will I sew more V9075 jumpsuits? I hope I will.
The first outing of the V9075 jumpsuit was at the celebrations of the diamond wedding anniversary of my parents-in-law. Introducing the women of the family.


 It took a lot of practice to throw the measurement tape; even my husband had to demonstrate it!


 So, I treated it with starch to make it easier to cut and sew. And it worked! I didn’t have a single problem.


 For me, a 1/4 inch presser foot is an unmissable guide for sewing french seams. Here you see that I use some tissue paper for the start of a seam of fragile fabric.
 This I do slightly different than shown in the
  Then I fold the fabric on the stitched line and press. Next, I fold the fabric again 1/4 inch and sew the hem at 1/4 inch. Here again, the 1/4 inch presser foot is unmissable.
 With my first Venus Kimono, I had trouble with the rolled hem at the neckline so I finished it with bias tape. For these two kimonos, I followed Annie’s advice and basted the curved neckline. And I learned that basting isn’t slowing your sewing process but in fact skilling it up.


 It’s the Jalie 2326 pattern. All of them


 It takes a while to unpick all the overlocked seams and I was a surprised how much thread it gave.


