What I sewed in 2018 –Top 5: the hits

Nope, we can’t ignore it any longer. The new year—2019!—is definitely here. That makes that I can look back again and reflect. What kind of sewing year was 2018?
Like the previous years, I collected all my sewing data in an infographic and here below you see the result of my 2018 sewing!

2018 sewing

What do these numbers say?

I sew mostly for women, using a pdf pattern from an Indie Pattern Designer.  Although, compared to previous years, it isn’t that pronounced anymore. There is a shift in who I sew for. In 2018 I sewed more for babies. How else could it be with the birth of our first grandson! This joyful event is, of course, THE highlight of 2018!

2018 sewing
M. wearing his long sleeve sweater. Free pattern from Dromenfabriek.
54 sewing projects

I was a bit surprised by this number when I did the counting.  I didn’t have the feeling that I sewed approximately 1 item per week! Say what? The previous years this was somewhat of a (hidden) goal that I could not reach and this year it came to fruition without special effort. Of course, with the 13 Bombazine Mitts, which I sewed in January,  I took already a big jumpstart.
And yes, these 54 projects are ALL finished projects! Alas, I also have 7 (seven!!) WIP’s! But I am going to catch up on them!
Another thing that helped to get this high number of finished projects is that I didn’t lose my sewing-mojo this year. Last year, I didn’t sew every day and certainly not 300 times like I set out to at the start of the year, but there wasn’t a significant period of non-sewing!
A new item that I checked for this year is for how many projects I used fabric from my stash. It’s about 47%. This figure could be higher but I’m already pleased with it. Even more so, because it came naturally. It was not a specific goal of me to sew as much as possible from my stash.

sewing 2018
Buying new fabric or searching through my stash?
Top 5 of 2018

Gillian form ‘Crafting a rainbow’ has this nice challenge for your #sewingtop5. I enjoyed following this last year so I will do it again this year.

2018 sewing

Top 5 Hits

The first thing I want to share with you is my sewing hits! My hits are sewing projects that give me the most joy! And this joy can be caused by several things: from the pleasure of wearing it, the challenge of sewing, the first time tackling a particular technique, or the gratitude you receive from the person you sewed for…

Here is my selection of joy for 2018.
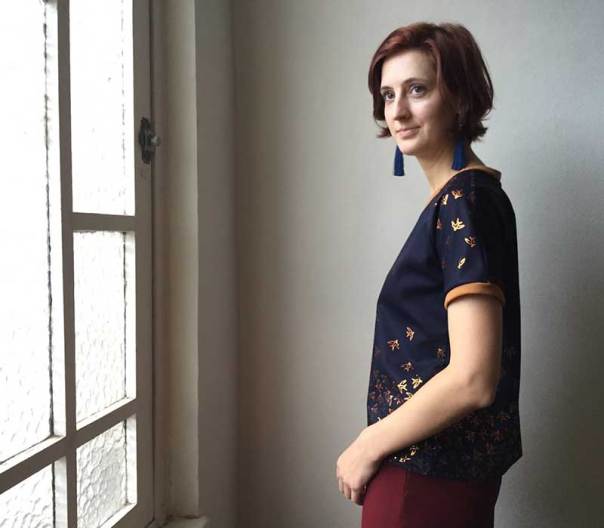
#1. My Jumpsuit

The Vogue V9075 Jumpsuit is without a doubt #myproudestmake. Why? I made a muslin for it so I would not have any fitting issues. This paid off. The fit is perfect!
This is also my best fabric-pattern combination of the year: a cotton and silk blend that I bought at Goldhawk Road in 2017. This counts for sewing from my stash! And I wore it a lot and with pleasure!

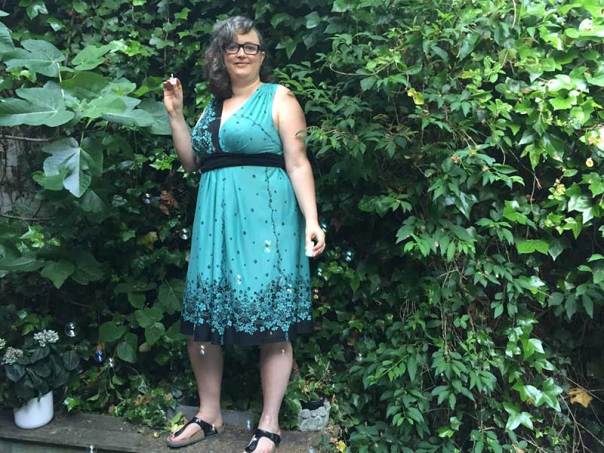
#2. The Statement dress

When you make a summer dress in a red/black plaid then you make a statement dress!! This dress gives me so much joy. Why? I had severe grading to do and it worked! The pattern matching is impeccable! And last but not least, my daughter loves it and that makes me happy!

#3. The Jill Coat

It was such a good decision to put a lining in the Seamwork Jill Coatigan. Even more, to put two buttons with a loop closure on it so this coat is totally suitable for Belgian winters.
I particularly enjoyed all the hand stitching I did because of the furry character of the fabric.

#4. All the baby clothes

I started sewing baby clothes in November 2017 when the first grandson of my brother was born. Then in 2018, there was the first granddaughter of my other brother and then in August our little treasure was born. Sewing all these cute baby clothes is great fun and these projects are great stash busters too!

#5. The Kingfisher Top for my daughter-in-law L.

I was over the moon that I could cut out the Kingfisher top out of one panel of Lotte Martens handprinted fabric. This panel was 60cm by 150cm. I had some serious pattern tetris to do but it worked. I was even more over the moon when L. loved this top I made for her birthday! It makes me happy when my family loves and wears the garments I sewed for them!

Next up in the top 5 of 2018 are Misses & Highlights, and Reflections & Goals.

Second blogiversary: the answers to your questions

Hello, my dear blog readers! I’m very thrilled today because exactly two years ago I published my first blog post. Though I don’t post as regularly as I want I still love blogging about my sewing encounters. To celebrate this second birthday I’m throwing a Q&A-party. So, here they come, the answers to your questions.

sewing blog


What’s your favourite thing you ever sewed? from Chloe
What’s your favourite garment you’ve ever made and why? from Jane

Chloe’s question popped up first. Pff! That’s an easy one, I thought. Then Jane made an addition to the question and that made me do some serious reflection. At first, I thought about my recent makes but then I realized they will come up in my Top 5 Hits 2018 that I will publish shortly. So, I had to look further and delving into my archives I found not one but two favourite garments that reached the “special” status.

#1 The Brooklyn skirt from Seamwork in African Waxsewing blog

Why is this skirt one of my favourite garments? I sewed this skirt in August 2016 and it was the first time I sewed with Africa Wax. I love this type of fabric so much. To fit the front pattern piece—the skirt is a half-circle skirt with a generous front box pleat—on the fabric I had to sew together two panels. I succeeded in an impeccable pattern matching. The all-around pattern matching of this skirt is the best I ever did. I put inseam pockets in it. I wore it already a zillion times and it hasn’t lost its fit and its elegance.

Impeccable pattern matching!
#2 The Vogue DKNY V1235 Dress for my daughterVogue DKNY V1235

I sewed it in May 2017 and it was my number one that year. Why? I’ll repeat what I wrote about it last year: “I sewed this dress for my daughter to attend the wedding of her best friend. I worked very hard on this dress: I made two muslins for it and executed my first FBA—that still sounds like a medical procedure ;). It was also the first time I sewed with border fabric. I love how the placing of the border I had in my head came out. My daughter received a lot of compliments on the dress and she loves wearing it. This makes me sew happy!”


Where do you get your fabric? from Kim
Mahlia Kent
Standing in front of the Mahlia Kent store in Paris. I’m wearing my African Wax print skirt!

I do not have a dedicated fabric shop. My fabric comes from everywhere! There are some brick fabric shops in my hometown Ghent that I go to sometimes. They cover the range from established values (Artevelde, Au Pluba) to new shops (Stoffenkamer).
I also buy fabric online. Girl Charlee UK is my favourite for knit fabric.
The thing I love the most about fabric shopping is searching for fabric shops or markets whenever I am in a foreign city. So far I bought fabric at Goldhawk rd (London), Mahlia Kent (Paris), Montmartre region (Paris), Kantje Boord (Amsterdam), Neuköllner Stoff (Berlin),…
But if you read some of my blog posts before you’ll know that my favourite fabric stall is at the market of Castel del Piano, a small Tuscan city. There is this lady who only sells remnants and I already found some real treasures there.

Buying fabric
Checking fabric at the market in Castel del Piano


What’s a typical day for you? Do you sew/create most days? from Sarah

I don’t have a typical day and I don’t sew every day. My job as a history teacher at a university college dictates my yearly calendar. The first term of the academic year (September-December) is hard with a lot of courses to prepare and to teach. So there’s barely any time to sew during weekdays. The second term (February-June) is less hard and that leaves some time for sewing during weekdays.
But one of the perks of being a teacher is having several breaks throughout the year! Then all my time is sewing time!

sewing blogger
Teaching in my me-made clothes


Do you finish one project completely before the next one kicks off!? from Ersan

Aww, this is a tough one because it touches one of my weak points, maybe even the weakest. No, although I want to, I don’t always finish a project before I tackle a new one. Why is that? I don’t really know. The only explanation I have is that I enjoy the thrill of starting a new project. In fact, I love cutting out a new pattern.
Sometimes I abandon a project because some urgent sewing with a deadline comes up: gifts, sewing community challenges, pattern testing… The result is that I now have several UFO’s and WIP’s! I don’t even want to count them. I also have some nagging children because some of the WIP’s are garments for them, that I promised them.
So, I want to make this one of my goals for 2019: “Finish all (ALL!) of my UFO’s and WIP’s & don’t create new ones!”.

sewing blog
Already cutting out something new when I still have so many projects going!
Does the blog take much of your time and effort? from Eleonora

In fact, it does. It’s not that I don’t know what to say! The main reason for it taking so much effort is that English is not my native language. So, the writing of a post takes a serious amount of time. I’m trying to turn it into a regular routine, like writing every day for about half an hour but until now I’m not very successful at it! Which is why when I actually sit down and write, it takes me awhile. That’s why it ’s one of my goals for 2019: “Write every day for about half an hour for your blog!”.
However, although it takes some time and effort, I still love it. Because there are actual people reading and following—say what 213 followers!!!—this blog. Which I continue to be perplexed at. More,  it makes my sewing-heart sing when I receive comments and questions.

sewing blog
Sewing or blogging? That’s the question


What’s your favourite sewing technique? from Emma

My favourite sewing technique would be sewing French seams—which strangely are called English seams in Dutch—because they make such a clean and crisp finish! It became even more my favourite sewing technique after I got myself a ¼ inch presser foot. This makes sewing French seams a piece of cake!

French seams 1/4 inch presser foot


So these are the answers to your questions. Thank you for asking and thanks for reading. If you have some more questions put them in the comments and I’ll be glad to answer them. Now, excuse me, because I have some bubbles to drink!


  Top 4 of most read blog posts this year!
  1. Eye-catchers #20
  2. The Ali Sweatshirt from Sew DIY
  3. The Seamwork Jill Coatigan with striped lining
  4. Burda Turtleneck Top


Second blogiversary: call for questions for a Q&A session

Q&A

The end of December is nearing and that means my blog is turning 2 years old. I thought it would be fun to celebrate this second blogiversary with a Q&A session. So, I would love to hear any of your questions about my sewing… and I will answer them on my blog on the 30th of December!

q&a


Ask your question here!


Sewing seconds or more…

If you read this blog regularly you know that I ask myself every time when I finish a garment: “Will I sew some more of this pattern?” Often I do but I never showed them to you. So now with December being the traditional month of overviews, I checked my sewing archives and found several second sewings (or even more…).

So, here are some of them.

The Moneta dress from Colette patterns

Moneta Dress

I sewed my first Moneta dress for the Moneta party in February 2017 and the urge to sew another has always been there. Then, when I was sewing my Beryl Bomber dress I put the leftover fabric on Lola, my dress form, who was already wearing my Wren dress. It was then that I noticed that the two fabrics worked together. Luckily, I had enough leftovers from both fabrics to cut out a new Moneta dress with 3/4 sleeves.
I made no alterations to the pattern and the sewing went super smooth. In hindsight, I should have made the bodice a little wider because this fabric has not the same level of stretch like the one of my first Moneta. It’s a little on the snug side but I’ll leave it this way.
I did not use clear elastic—I hate sewing with clear elastic—for the gathering of the skirt but a small, regular white elastic which I had in my stash. It worked out perfect.
One small sewing secret: I didn’t hem the sleeves and the skirt. I wore the dress already several times and the fabric doesn’t fray at all. So I am just going to leave it this way!


The Ali Sweatshirt from Sew DIY

Ali Sweater DIY

When I finished my Ali Sweatshirt,  E., my daughter-in-law, was very enthusiastic about the pattern. So it wasn’t hard to find something to sew for her birthday! I used two brushed sweater fabrics from Chat Chocolat: Mackerels for the bodice and Mackerels- the essential for the yoke, sleeve and cuffs.
The birthday gift was a huge success. She likes the sweater a lot and that makes me very happy!

Ali Sweatshirt DIY

The Kingfisher top

Kingfisher Top Sewing Revival

When I finished my Kingfisher Top I knew without a doubt that I would sew more very soon! I proved to be right.
Here again, two things came together. My other daughter-in-law’s birthday was nearing and there was a sale of Lotte Martens handprinted fabric in my neighbourhood. I love Lotte Martens handprinted fabric. I used one of her panels for my plisé skirt last year.
When I saw this panel with the copper birds I knew immediately that it would be perfect for a top for L. There was only a minor problem: the panel was 60 cm by 150 cm.
To make it work, I divided the sleeve in two and cut them on the bias. As you can see in the photo I only have some small pieces of the fabric left.Kingfisher Top Sewing Revival

Just like with the first Kingfisher top the sewing was a walk in the park. For the binding of the neck and the sleeve cuffs, I used some peanuts brown rib I had in my stash.
This birthday gift was also a huge success. And seeing somebody being very happy with something I sewed makes me (again) very happy.

Kingfisher Top Sewing Revival


The Burda Turtleneck Top

Burda Turtleneck Top

I loved my Burda Turtleneck Top so much that I immediately sewed another one the same week. I had this soft jersey in my stash for about 3 years so it was about time to use it. Again this pattern proved to be very easy to sew. One of the joys of sewing a pattern for the second time is that you already know all the tricks.
I am so enthusiastic about this pattern that I have cut out the third one. Alas, this is one of my WIP’s. I cut it out in April but I have to tackle it soon. Like I said: ‘It’s an easy sew. Just a few hours work!’
Burda Turtleneck Top


And you? Do you have sewing seconds??


The Snowball high neck dress from Waffle Patterns

The Snowball high neck dress from Waffle Patterns was already on my 2017MakeNine and my 2018MakeNine sewing wish list. When I first saw this pattern back in August 2016, I was charmed by the lines and the shape. I immediately bought the pattern and then it got pushed to the back of my mind… like so many things.
I don’t know how your sewing mind works—hmm, I don’t even know how mine works!— but it was the sew frosting challenge that made me think about this pattern again. In fact, I wanted to sew it out of the piece of Mahlia Kent fabric I have (one hundred percent frosting!) but I didn’t have enough fabric. Then I thought I could make a wearable muslin out of this metallic fabric to see how the fit went. Maybe I had to take in some seams and then I still could use the Mahlia Kent fabric. As you can see, that didn’t happen.

snowball high neck dress waffle patterns


The Snowball high neck dress pattern

It’s the first time I sewed a garment from Waffle Patterns and I liked all of it. As the idea of sewing this dress came up on a Saturday night I hadn’t the time to use Patternsy to print an A0 format. So I printed 24 pages of the pattern and glued them together. There were very clear marks so it didn’t take long.
The Snowball high neck dress consists of 10 pieces: 7 pieces for the dress and 3 pieces for the facing. To give the facing a smooth fit the back facing has shoulder darts with curved dart legs. This is a classy tailoring technique that I like.

snowball high neck dress waffle patterns
The first fit with machine basted seams

Based on the finished garment measurements I cut out size  48. I made no alterations on the bodice and lengthened the hem with 5 cm.
After the first fit—I machine basted al the seams with a stitch length 5 and hand basted the zipper— I slightly narrowed the upper front bodice above the bust.

snowball high neck dress waffle patterns


The fabric

I bought this fabric last Summer at the market in Castel del Piano. As with all the fabrics I buy there I don’t know what the exact composition of this fabric is.  Probably a poly combo. It has this metallic shine and depending on the light it varies from colour. It’s more beige-ish than greyish though!
This fabric has a medium weight but for this pattern, a more sturdy fabric might have been better.

snowball high neck dress waffle patterns

I didn’t have enough fabric for the facings so I used some blue gingham from my stash.snowball high neck dress waffle patterns


The sewing process

The sewing was plain sailing. I enjoyed every bit of it. The instructions were spot on and illustrated with clear drawings. I loved the drawing of the little iron to indicate which seams should be pressed!
For inserting the blind zipper I followed my own method which is rather simple. First, I hand-basted the zipper and then I stitch it with my blind zipper foot.

snowball high neck dress waffle patterns

snowball high neck dress waffle patterns

Conclusion

I’m very happy with my Snowball high neck dress! I don’t consider it a muslin any longer but a perfect wearable dress.  Though I particularly like the design of the high neck it takes some time to get used to it. Probably I should have interfaced the facings—which I didn’t🤦🏻‍♀️—so the collar would stand more.
Will I sew another Snowball dress? Maybe! But then I surely would use a fabric with more body.

snowball high neck dress waffle patterns


The Beryl Bomber Dress from Named Clothing

The seed for sewing the Beryl Bomber Dress was planted during Sew My Style 2017. The chosen pattern for  December 2017 was a pattern from the then not yet launched Named Clothing AW17 New Collection. Although I gave up the Sew My Style challenge,  I kept following it on IG and blogs. So, when Named Clothing launched their AW17 Collection, it was the Beryl Bomber Dress that caught my attention. I love the design of a bomber jacket and I find it very clever of Named Clothing to use this design and turn it into a dress! Then it only took me nearly a year to sew one for myself!

Beryl Bomber Dress


Bomber Jackets

Whenever I think about bomber jackets this photo of ca. 1944 comes to mind. It’s a group of Women Airforce Service Pilots leaving their B-17. Look at their cool bomber jackets! And they named their B-17 “Pistol-Packin’ Mama”!Beryl Bomber Dress


The Beryl Bomber Dress pattern

The Beryl Bomber Dress pattern consists of 9 pieces. As I planned to sew the dress I ordered a printed A0 pdf-pattern at Patternsy. This was my first time I used this platform and I was 100% satisfied. You upload your pattern, they email you the price and if you agree, they print your pattern on very usable tissue paper. And it only takes a few days!

Beryl Bomber dress
I love the decorative loop at the back.

Based on the finished measurements I cut out size 46. I lengthened the sleeves with 4 cm (2 cm under the biceps line and 2 cm under the elbow line).  Further, I lengthed the hem and the facing with 4  cm.

Beryl Bomber Dress


The Fabric

I bought this fabric at my small local fabric store. It’s a knit of medium weight with an unknown composition. The fabric salesman in this store is a man of few words. So when I asked about it he just shrugged. I was attracted to the combination of the colours and the black design lines.
Somehow I thought that I needed a knit for the Beryl Bomber dress but after reading the instructions thoroughly I discovered this wasn’t the case. Luckily this fabric has only a minor stretch percentage so it worked out well.
One downside of this fabric is that threads are easily caught on desks and chairs. So I don’t know if the dress is going to lead a long life???

Beryl Bomber DressFor the collar and sleeve cuffs, I used a strong black rib knit with small golden speckles.

When I started to cut out the pattern pieces I became aware that I had to do some stripe matching! You wouldn’t say it at first glance when you see the fabric. But when the seams were a little askew it disturbed me a lot. So, I cut out the pieces on a single layer of fabric.

Beryl Bomber Dress

The sewing process

The sewing of the Beryl Bomber dress was fun. Sewing the collar and the zipper were a bit challenging but I liked it. The instructions are clear with crisp designs. I followed them for about 90%.

As I worked with a knit fabric I used my overlocker for all the seams. I machine basted (stitch length 5) the collar and finished it too with the overlocker. To reach a perfect fabric matching I hand basted the zipper and the pockets.

Beryl Bomber Dress


Conclusion

I’m very, very happy with my Beryl Bomber Dress. I wore it a lot already for several occasions. It’s extremely comfortable, due to the knit fabric I guess. I wore it during a two-hour flight and it never felt uneasy.
Will I sew more? I hope to. Also because my daughter and daughter-in-law expressed their enthusiasm for this model and design. Now, I just have to find some time (an old story I know!).

Beryl Bomber Dress

How to sew 7 Hudson Pants and a mini-one!

I got this idea—sewing matching Hudson Pants for my family—from Emma (@emmas_atelier). For the ‘Fun prompt’ of the #bpSewvember photo challenge, she posted a picture of the set Hudson Pants she made for Christmas. I found this very inspiring as I love sewing gifts and I love the Hudson pant.
You can read below how I did it!

Hudson pant True Bias

The Hudson Pant pattern

The Hudson Pant is a pattern for very comfortable sweatpants and there is a female, male and mini version of it. At that time I already sewed 5 Hudson pants—for my daughter, for my husband and for myself— so the pattern had no more secrets for me. I already made the necessary adjustments on these patterns: lengthening of the crotch line for my daughter and lengthening of the legs for all of us.
I traced new pattern pieces for the pants for my daughters-in-law. For my sons, I used the pattern of my husband with some extra length on the hems of the legs.

Hudson pant True Bias


The Hudson Pant Fabric

I bought 7 m of grey melée ‘sweatshirt fleece’ with a soft brushed inside at my local fabric shop. It’s a blend of cotton/polyester. Luckily for me, it was the end of the bolt so I got some more than 7 m and I needed it.

Hudson pant True Bias

The advantage of using the same fabric for all the Hudson pants is that you can really place your pattern pieces very economical. More, you can easily fit the smaller pieces in the leftover fabric after you’ve cut out the bigger pieces

Hudson pant True Bias


Sewing 7 Hudson Pants in a row

I had already the different measurements of everybody so I could cut out the pattern pieces. To make sure I didn’t forget any of them (8 pieces per pants makes 56 pieces in total!) I made a graph and I gave every pant a different colour. Because there was an obvious difference between the men’s and women’s pants I could use the same colour for the marks twice.

Hudson pant True Bias

I also put these marks on the wrong side of the pattern pieces.

Hudson pant True Bias

Then I followed the successive stages of the sewing instructions but I did each of them 7 times. I kept sure I always put the several “pants-in-construction” in the same order.

Hudson pant True Bias

I sewed everything with the overlocker. As I sewed already 5 Hudson pants before I had no problem at all with putting everything together.

Hudson PantA pile of “pants-in-construction” after sewing all the pocket pieces. You can see some of the pink and yellow marks.

Hudson pant True BiasAll the Hudson pants are the same except for my husband’s. He didn’t want leg cuffs.

The gift

When I gave the presents I was nervous of course but they were all surprised and happy. They all tried the pants immediately and alas one of the pants for my daughter-in-law was too small on the legs! I widened them with a black strap and now they are good. Unfortunately for her, it took me more than a year to do so.  I gave the too small pants to my godson and made a new one for my daughter-in-law. Can you imagine my horror when she tried it on it was again too small, although I adjusted the pattern. That’s why I fixed it with the black straps.

Hudson pant True Bias

Hudson pant True BiasThe ‘kids’ looking cool in their Hudson pant!

The mini-one

This whole story took place in 2017 but we never got together to make a picture with all of us wearing our Hudson pant. In the meanwhile, our grandson was born so I had to make matching pants for him! There is no Hudson pant pattern for babies so I took the Oliver pants pattern that I used before. But I used leftovers from the grey fabric and from the fabric that I used for the dress for his mama when she was still pregnant with him.

Hudson pant True Bias

Conclusion

My family and I, we love our matching Hudson pants. We all think they are very comfortable and we love wearing them.
Will I sew more Hudson Pants? I guess so because after the photoshoot my son asked me to sew him another one!

Bonus: the Hudson pant Photoshoot

Hudson pant True Bias

Hudson pant True Bias Hudson pant True Bias Hudson pant True Bias

Do the Hudson Dance!

Hudson Pant True Bias

The Kingfisher Top from The Sewing Revival

Sometimes a pattern just falls on your head! I blame @robinsnest1926 😉 . When she posted her first Kingfisher Top on Instagram I immediately wanted to sew one myself. The pattern ticked several of my boxes: the combination of a woven fabric with knit bindings, a deep neck, a loosely—but not too wide— fit and raglan sleeves. I love raglan sleeves!
So, I bought and downloaded the Kingfisher Top immediately. Alas, actually starting to sew the top took longer than expected.

Kingfisher Top Sewing Revival


The Kingfisher Top pattern

The Kingfisher Top is a pattern from the New Zealand indie pattern company The Sewing Revival. It was the first time I heard from them and I was pleasantly surprised by their offer of patterns in their webshop. So, I also bought the Tui Dress, since it was the beginning of September and still very warm. Optimistically, I thought I would still have enough time to sew that too!

Kingfisher Top Sewing Revival

I ordered the pattern on a weekend and I wanted to start sewing immediately so I printed the pattern tiles and glued them together. The marks on the pattern tiles were clear so this was a quick job.
The Kingfisher Top pattern consists of 3 basic pieces: the front, back, and the sleeves. Then there are the pieces for the neckband and the sleeve cuffs, both for the short and the 3/4 version. I like that you don’t have to draft the bindings yourself.
Based on the measurements on the size chart, I cut out the XL and didn’t make any adjustments. Although I like the fit, next time I maybe will grade down a size on the shoulder-arm part.


The Fabric

I bought this Italian silk at my favourite fabric stall at the market in Castel del Piano. It was a remnant so I had no other option than to make the top with short sleeves.
For the contrasting fabric, I used this black rib with bronze sparkles I still had in my stash. I used it for my second Juniper cardigan.

Kingfisher Top Sewing Revival


The sewing process

The sewing of the Kingfisher Top went smoothly without hiccups. The Sewing Revival gives it a 4/10 on the easy score and that’s a fair score.
The instructions are extensive with photos and illustrations. Not so much for me but very useful for a beginning sewist. This top came together in about two hours. First, I sewed all the seams on the overlocker. Then I machine basted (stitch length 5) the neckband and the cuffs and also finished them with the overlocker.


Kingfisher Top Sewing Revival


Conclusion

I think it’s obvious that I am happy with my Kingfisher Top. It’s a joy to sew and a joy to wear. I particularly love the feel and the drape of the silk. And I am lucky that we are now having these extremely sunny days here so I can wear it a lot!
Will I sew some more of this top. I guess you already know the answer. So thank you @robinsnest1926 for showing me the Kingfisher Top.

Kingfisher Top Sewing Revival

The faux wrap skirt from Knipmode

There are 1000 reasons to start sewing a new garment, aren’t there? Well, the sewing of this skirt started with an email of Knipmode. They offered me a discount on their patterns because they missed me. (It had been a while that I bought one of their patterns! Actually, the last time was in December 2016.) I know that this kind of emails is pure advertising but once in a while, I’m sensitive for this sort of stuff. So I visited the website and this skirt got my attention. It looks like a wrap skirt but it isn’t. It is a fitted skirt with an asymmetrical front flap fixed to the skirt with a loop.

faux wrap skirt

The Knipmode skirt pattern

The pdf-patterns from Knipmode have no A0-format so I printed and glued together 27 pages. The different lines and assembly notches are very clear thus that wasn’t a hard job!
The pattern consists of 7 pieces which are all on the printed pages.  You don’t have to draft some pieces yourself. I like that.  To save paper the extra front flap is drawn in two pieces.  You have to tape them together. Here also the assembly line is very clear.
Be aware that these pattern pieces come without seam allowances.

knipmode skirt

Based on the measurements on the size chart, I cut out a 50. I took the size of the waist as my guideline as the skirt is fitted. I lessened the curve of the hips with 2 cm and lengthened the hem by 5 cm.  This all turned out perfect when I fitted the skirt.

knipmode skirt

The fabric

I bought this beautiful Italian wool in February 2016 at the market in Castel Del Piano. It’s dark blue (very difficult to photograph) with a subtle light blue woven check.

Italian wool

I immediately thought about this fabric because the model of the skirt is in plaid. The only problem with these fabric pieces from the market in Castel del Piano is that they are remnants so you have to take the piece as they come. I had 1,28m on 1,50m and the instructions asked for 1,60m on 1,40m. You need even more if you want to use a print! But I managed. I could even cut out the front flap on the bias.

The sewing process

Knipmode gives the sewing of this skirt a difficulty level of 2,5 (on 4). In my opinion, this is a correct rating.
The instructions are compact and without illustrations. But luckily for me in Dutch, my native language. I didn’t have a lot of trouble to put the skirt together. The only point where I  had to read the instructions a few times is when you make the loop on the front piece.  Looking at the photo now it seems obvious.
knipmode skirt

knipmode skirt

knipmode skirt

Conclusion

I am very happy with my new Knipmode skirt. I love that it is a fitted skirt with this twist at the front. Although I sewed the skirt on the last day of Summer I think I can wear it easily with tights in Autumn.
Will I sew another one? I guess I will. In fact, I’m looking forward to it!

knipmode skirt

The Ali Sweatshirt from Sew DIY

Last Tuesday Sew DIY launched a new pattern: the Ali Sweatshirt. It’s a casual and comfy sweatshirt with some interesting design features. The design of the back yoke just asks for experimenting. I was one of the lucky sewists to test the pattern back in July.  Although it was high summer at that time, the testing was a joyful ride.

Ali Sweatshirt


The Ali Sweatshirt pattern

The Ali Sweatshirt comes in two versions: one with a crewneck a one with a scoop-neck. I choose view B, the scoop-neck. The pattern consists of 7 pieces. Based on my measurements I cut out the XL but in hindsight, I should have cut out the L because there is a lot of ease at the bust. I understand Beth updated the pattern now with more narrow sleeves.  I assume that I would prefer this option.
As usual,  I lengthened the bodice by 4 cm. This is easily done because of the lengthen/shorten line on the pattern piece.

Ali Sweatshirt


The red striped fabric

After sewing the maternity dress for my daughter-in-law I had still enough of this beautiful Red and White Stripe Cotton Knit from Girl Charlee UK. It’s soft and I had already experienced that, even though being a knit, that it behaved very well under the machine! This and the possibilities the stripes give for some experimenting with the placement of the back yoke, are the reasons why I choose this fabric. Because usually, I am so NOT a striped-garment-wearing person. I think my latest striped sweater dated from 1975!

Ali Sweatshirt


The sewing process

Sewing the Ali Sweatshirt is a joyful ride. Nearly all the seams are straight seams and Beth wrote very clear instructions. I sewed the sweater totally on my overlocker and I topstitched the seams on my regular machine with a walking foot and a very small zig-zag stitch.

The one thing of the construction that took some thinking was the chevron I had in my head for the back yoke. How did I do it?

  1. I drew a 45° line (the green one) on the pattern piece of the yoke. I transferred some of the red stripes on the pattern piece too. This would make it more easy to cut out the second part of the yoke.Ali Sweatshirt
  2. I cut out one piece of the yoke in a single layer.
    Then I transferred the 45° line and the red stripe marks to the back side of the pattern piece and checked the placement on the fabric.
    Ali Sweatshirt
  3. After, I put the already cut out piece with right sides together on the fabric to cut out the second piece of the yoke. I carefully matched the stripes.Ali Sweatshirt
  4. Then I basted the yoke and stitched it with my overlocker. For the topstitching, I used the small zig-zag stitch on my sewing machineAli Sweatshirt


I used the same procedure for the plaid Zéphyr dress I sewed for my daughter.


Conclusion

I love my Ali Sweatshirt. I already wore it a lot, especially on colder evenings when it makes me feel all comfy and cozy. I’m even wearing it now! If you are looking for an easy to sew sweatshirt where the pattern design still hands you some possibilities to give it a personal touch, don’t hesitate. There is a launch discount for this pattern until Sunday.

Ali Sweatshirt