Laminaria Swimsuit

The Laminaria Swimsuit from SeamstressErin Designs

I love going to the seaside and I love swimming in the sea. Hence, I needed a swimsuit. I sewed my last one, the Burdaystyle Alison Swimsuit, three summers ago and I was a bit tired of it. So no wonder that, when SeamstressErin launched the Laminaria swimsuit, I was immediately drawn to this pattern. I even sewed two already: one for me and one for my daughter.

Laminaria Swimsuit SeamstressErin

The Laminaria Swimsuit pattern

For the Laminaria Swimsuit pattern, I went—for the first time—to the copy shop to print the pattern on A0 format. I didn’t read the accompanying information in advance, so I didn’t know that the pattern consisted of two pages. When the paper role of the printer was finished after one sheet I told the shop assistant that it was perfect. As we are now staying in our holiday home in Italy it isn’t possible for me to get the second page printed. This means that I could not sew view A of the swimsuit with the sinuous inset panel. Of course, that’s the view I love the most. So I chose view B with a soft v-neck and the crossed straps.

The pattern for the plain swimsuit consists out of 2 pieces: the front and the back. Plus two rectangles for the straps.
According to the body measurements table of the pattern, I have a different size for the bust, the waist and the hips. So I graded between these sizes and being a tall girl, I lengthened the pattern with 2 times 2,5 cm and the crotch seam with 1cm. That is what I like about sewing your own swimsuit: the possibility to lengthen the torso to give you a comfortable fit. As I am 1,81m tall, this was always a struggle for me with RTW swimming suits. (I did the same adjustments for my daughter’s swimsuit.)

The fitting of the swimsuit

After grading and lengthening the pattern I had some issues with the cup size. According to the instructions, I had to trace the pattern with the D-F cup—I have 5 inches difference between under bust and full bust measurements—but it turned out way too large. I found it a little confusing because I never had more than a C cup for my bra’s. Anyway, I was able to resize the pattern to the A-C cup and it came out perfect.
For my daughter—who has 6 inches difference between under bust and full bust measurements—the D-F cup pattern was spot on.
When I mentioned the fitting issues on IG, Erin reached out to me and reassured me that after sewing in the elastic the gapping would vanish and the top would clinch to the body. She was right.

The fabric

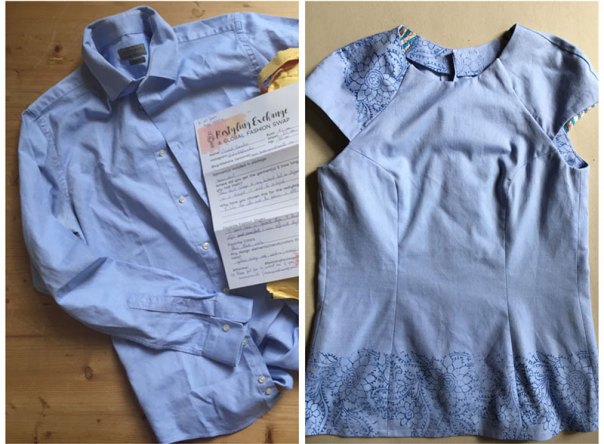
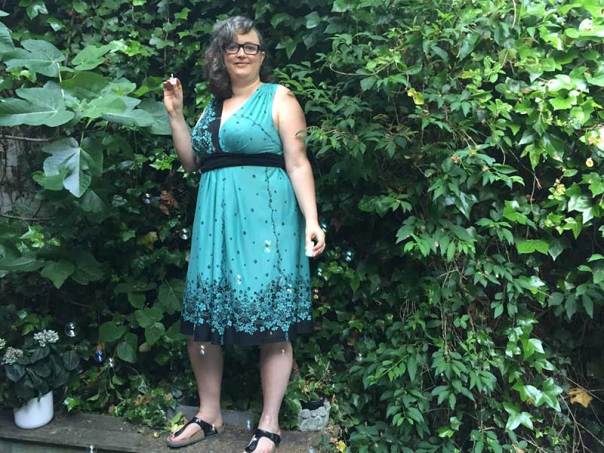
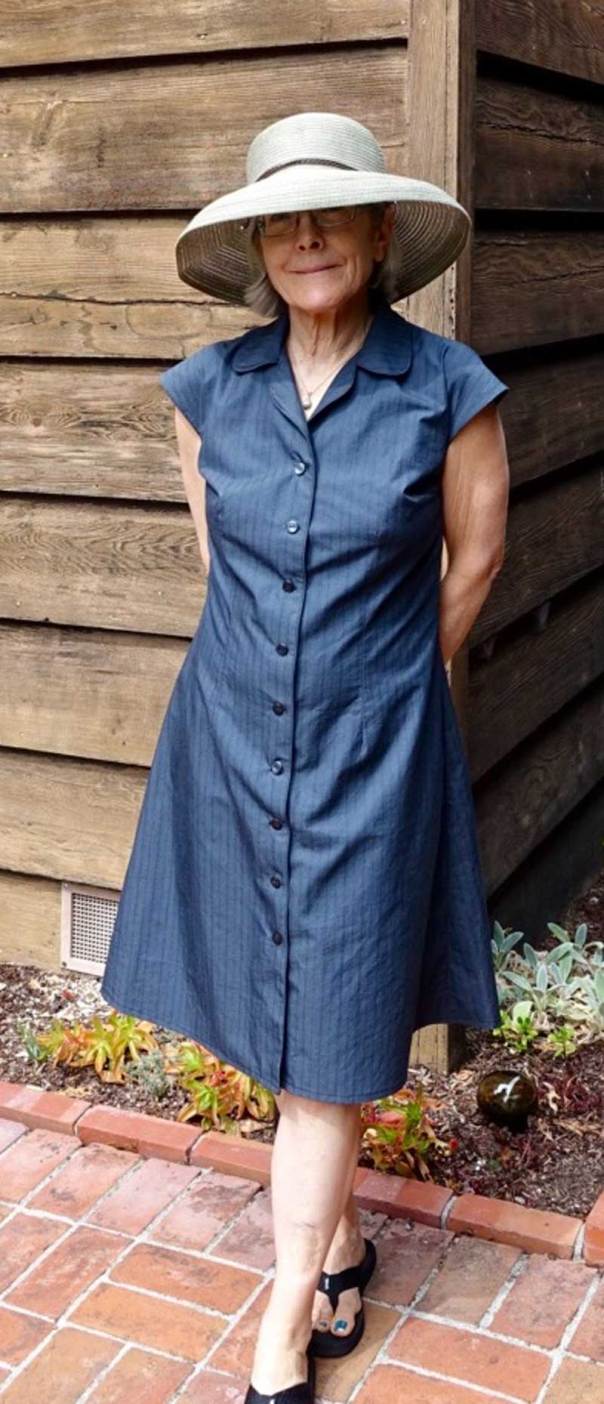
I had some leftover from the previous swimsuit I sewed and also from my Moneta Dress. But both pieces were too small to cut out the plain suit. Being already in our holiday house in Italy without access to fabric stores in the immediate vicinity this was a small problem. Luckily there was the monthly market in Castel Del Piano where I bought two cheap dresses—one with the chevron pattern and one plain black— with 5% spandex in the fabric. So sewing these swimsuits also became a refashion project. I even could use the small belts from the dress as straps.
For the inserts and the straps of my daughter’s swimsuit, I used leftovers from the chevron fabric.

The sewing process

This is the first time I sewed a pattern from SeamstressErin Design and it was a joyful sewing. With the pattern come extensive and plain instructions, illustrated with clear drawings. On top of that, there are helpful tutorials on the site with step-to-step pictures. I basted the lining and the suit together all around. This was a great help for sewing in the elastic.

Is it a quick sew?

The sewing itself didn’t take that long although sewing in the elastic isn’t something you can do in a rush.  It was the tracing, the grading and the alterations of the pattern pieces that took me some time.
Sewing a swimsuit is not difficult and I would recommend it to anyone who has trouble finding a suitable RTW swimsuit.

Conclusion

I heart my Laminaria Swimsuit. The fit is so comfortable and it came through the sea test with flying colours. I swam, jumped and dove into the sea and not once did I have to readjust it. Now I am only waiting for Burt…..

Eye-catchers #15

An eye-catcher is a person or a thing that attracts the attention

The online sewing community is very visual. So, every day I see heaps of sewing related images on social media and blogs. Some of them catch my eye because they make me think or they give me inspiration. Here, I want to share these eye-catchers with you.

eye-catchers sewing

Follow below what caught my eye recently:

The pillowcase dress from Aida

pillowcase dress

When recently Europe was suffering from a heat wave Marilla Walker whipped up a pillowcase maxi dress. Basically, it consists of two rectangles and a shoulder strap. Aida got inspired immediately.  I just adore her version. Maybe I am going to ‘whip one up’ too.

The Edith dress from Nancy

Edith Dress Maria Denmark

Also made for hot weather is this Edith dress by Nancy from ‘Sewing in Surf City‘. It is a mid 50’s-style inspired shirtdress from Maria Denmark Patterns. You can also sew it as a shirt.  I love Nancy’s stylish version. It would also have been a good entry for the Sew Together for Summer Challenge —whose deadline I didn’t meet.

Melisha Simone’s shirtdress

Carolina Herrera

Speaking of the Summer of the Shirtdress: look at this astonishing one Melisha sewed. I am totally in awe! She let her be inspired by a Carolina Herrera dress she saw at Neiman Marcus. By hacking two patterns—M7351 and v1534—she made her own version of it. That’s also something I would like to do: hacking existing patterns to create a new one.

The cold shoulder top from Zoona Nova

African Waxprint Cold Shoulder top

Two beautiful tops in African waxprint, designed and sewed by Tamara from Zoona Nova. She lives in Malawi, so she has easy access to all these beautiful fabrics. I also like the sleeve detail. This could be an idea for the #sleevefest2017 that was launched last week.

Vera Venus’ 1930s dress

Vera Venus Dress

When I saw this dress sewed by Vera Venus my mouth dropped to the ground. For me, this is the ultimate vintage-style dress. It is hard to believe it was only sewed this week and not 80 years ago. I envy Jeanne’s (the woman behind Vera Venus) skills.

Did anything catch your eye this week?


The Chari Dress from Schnittchen Patterns

Last December 2016, Silke from Schnittchen Patterns asked for test-sewers for the Summer ’17 collection. I volunteered, as I am always in for a challenge.  When the different patterns were suggested I noticed that several of them had ruffles. Ruffles are very in-fashion this Summer. Normally it is not my thing but I decided to give it a chance and chose the Chari Dress to test. I am glad I did because the Chari Dress is a charming dress that I love to wear.

Chari Dress Schnittchen Patterns

The Chari Dress Pattern

I received the pattern on A0-format, by mail. I found this a very thoughtful gesture of Silke. The pattern for the sleeveless Chari dress consists out of four major pieces: the front, the back, the ruffle and the tunnel case for the elastic. You can also sew the dress with sleeves and as a shirt.
I cut out a straight 44 based on my measures. Being a tall girl (1,81 m) I put some 5 cm extra above the waistline. It came out perfectly. Furthermore, I took off 1 cm of the armhole at the shoulder point to avoid gaping.

Chari Dress Schnittchen Patterns

The fabric

I used a very soft rayon from my collection. (Yes, I speak of my fabric collection instead of my fabric stash!) I bought it more than a year ago on a big fabric fair ‘Stoffenspektakel‘ in my hometown. The fabric has a nice drape so it is very suitable for the ruffle and the elastic waist.
Unfortunately, I didn’t have enough fabric—which is often the case when I want to use a fabric I own already.  I cut the front piece in two at the waistline where the elastic tunnel is sewed. It is not noticeable because this seam disappears in the gathers.

Chari Dress Schnittchen Patterns


The sewing process

For the testers, the sewing instructions were rather brief. This is not the case for the released patterns. They have detailed instructions with designs.
Overall the sewing went smooth. There are only two less obvious sewing techniques needed to put together this dress.
1) Finishing the armhole with bias binding.
Although I used this technique before I relied on this very clear tutorial of ‘Sew Over It’.
Finishing the armhole with bias binding. Here you see the seam where the front is cut in two pieces.

2) Finishing the v-neck with bias binding.
This was the first time I used this technique. Therefore I relied on this extremely clear tutorial of Sonya Philip.

Sewing a v-neck bias binding with a little dart. I finished the ruffle with a small zig-zag. I like the frayed edge.

The finished v-neck binding.

Is this a quick sew?

Well, so and so. Sewing the Chari sleeveless dress is not that difficult! As mentioned above the finishing of the armhole and the v-neck are two moments you have to take your time for. But it is worth it.

Chari Dress Schnittchen Patterns

Conclusion

I  never thought that I would jump on the ruffle boat but I did. More, I adore it. I finished the Chari Dress mid-May and due to the extremely hot weather in our northern country, I wore it a lot so far. If you want a comfortable dress for hot days; sew a (sleeveless) Chari Dress from Scnhittchen Patterns.

Chari Dress Schnittchen Patterns


Eye-catchers #14

An eye-catcher is a person or a thing that attracts the attention

The online sewing community is very visual. So, every day I see heaps of sewing related images on social media and blogs. Some of them catch my eye because they make me think or they give me inspiration. Here, I want to share these eye-catchers with you.

Follow below what caught my eye recently:

sewing related images

Michelle’s couture dress

couture dress

While the whole of Europe is suffering from a heat wave our friends in the Southern hemisphere are facing winter. Look at this fabulous winter couture dress Michelle sewed. I love everything about it: the gorgeous bouclé, the piping, the central panel on the bias. She sewed it using techniques from Susan Khalje.

Tiffany’s Ogden Cami dress

Ogden Cami Dress

More appropriate for high temperatures is this elegant Ogden Cami dress from Tiffany.  She lengthened the blouse pattern from True Bias and put vents on the side. That is a good idea. At the moment I am wearing my only maxi dress and I feel the comfort it gives for this warm weather. I have the Ogden Cami pattern already, so more maxi dresses will come.

The back straps on Wiebke’s dress

dress with back straps

Wiebke from naezimmerblog, drafted this dress herself. The placing of the straps is just so perfect and stunning. Very inspiring.

Two sewing tips

stabilizing seams

Two ways of using recycled material to stabilize shoulder seams. On the left is the tip from Meg: use strips from your woven selvedge. On the right is Suzy’s tip: use those annoying ribbons you find in RTW clothes. As I am hooked on recycling now I am sure going to use these tips.

Laura’s winter coat

upcycle winter coatThis coat immediately caught my eye. Laura from the Final Stitch did a fantastic job here. Not only did she use an old woolen blanket—speaking of upcycling!—she also used an old Burdastyle lingerie pattern for it. Hats off!

Did anything catch your eye lately?


How to restyle a men’s shirt in a women’s top

When Amy and Pilar announced the first annual restyling exchange I immediately jumped on board. Those who read my blog know that I am always in for a challenge!
What is this restyling challenge? You receive a garment from someone to restyle it. Meanwhile, you send a garment from yourself to someone else, also to restyle it. So I received a men’s shirt from Elisabete and sent an old dress to Linda. A simple and beautiful concept. To make it more easy to sew something a questionnaire with measurements, colour and style wishes was sent with the garment.

restyle men's shirt
From a men’s shirt to a women’s top.
Restyling: how do you start?

I have never restyled or refashioned an existing garment before. So I started with unpicking the main seams of the shirt. In the meantime, I thoroughly went through Elisabete’s IG-feed and read her blog. This gave me an insight into her style, but it was also a little intimidating because she is a very skilled seamstress and ‘refashionista’!
Looking through her pictures I got the idea of sewing the Kastrup top from ‘How To Do Fashion’. I have this pattern in my pattern collection but I didn’t use it so far. So no extra costs were made.

Fitting the new pattern on the shirt

Once I decided to sew the Kastrup top I stuck to it. This top has a vintage vibe and also nice sleeves. And, Elisabete has a thing for particular sleeves.
It was quite a puzzle to get the top out of the shirt. This was also the hardest work of the restyling.

restyle men's shirt
Fitting in all the pieces and cut them single layer.

restyle men's shirt

It was not possible to get the back pieces out in one piece. So I made a yoke for the back and used the original closure of the front for the rest of the back.

restyle men's shirt

I unpicked a little of the sleeve placket to be able to cut the new sleeve pattern.

restyling
The largest use of the old shirt!
Making my own border print

woodblock stamp printing

After cutting the pattern I was not satisfied. I wanted to give this restyling a more personal touch. So I decided to make my own border print. Also prompted by the recent positive experience I had with a border print.
My husband, who is an editor of artists books, has these Indian woodblock stamps, that would be perfect. I bought some blue textile ink and together we gave it a go!

woodblock stamp printing
The Indian woodblock stamp.
woodblock stamp printing
First test on a rest of the shirt.

restyle men's shirt

It is easy to print your border after your pattern pieces are cut. Then pattern matching is not difficult.

woodblock stamp printing

I was able to give one sleeve a non-conventional placing of the print. Which I adore.

Kastrup top - How to do Fashion

restyle men's shirt

Later on, I needed the test pieces to cut out the arm facings.

The Kastrup Top

Kastrup Top - How to do Fashion

Here is the result: «insert drumroll» the Kastrup Top! I adore how it came out. There are several features that I am proud of:
– The back with the yoke and the original front button placket.
– The sleeve with the non-conventional placing of the border.
– The vintage fabric used for the lining of the sleeves.

Conclusion
Kastrup Top - How to do Fashion
This is how I look after a full day of sewing.

I am super satisfied with my first restyle project ever. Now I hope that Elisabete likes what I’ve done with her husband’s shirt. I want to thank Amy and Pilar for this great challenge. I enjoyed every minute of it. More restyling projects will definitely follow.

*** Update ***

When I was finishing this post, the message came through that Elisabete finally received my restyled top. She liked it and, moreover, the top fits! I am a happy woman now.

restyling Kastrup Top - How to do Fashion
©photos: Elisabete Carvallo


Eye-catchers #13

An eye-catcher is a person or a thing that attracts the attention

The online sewing community is very visual. So, every day I see heaps of sewing related images on social media and blogs. Some of them catch my eye because they make me think or they give me inspiration. Here, I want to share these eye-catchers with you.

online sewing community

Follow below what caught my eye recently.

The Gertie dress made by ThatBlackChic
B6453
Those who read my blog know already that I have a weak spot for clothes made in African wax print. So this lovely version of B6453—designed by Gertie—sewed by Michelle for her daughter Mori, immediately got my attention.So far I only sewed two garments for me in African wax but I have some more fabric in my collection waiting. I bought the pattern already!
The skirt from _handmadekate_
African wax skirt
When you have a lot of African was print you have a lot of scraps. Tryntsje used them to make a pleated skirt. She stitched the pleats inside to keep them a little hidden. Such an inspiring idea.
The dress in Alexander Henry fabric
B6094
Not only clothes in African Wax get my attention but in fact any extraordinary design catches my eye. Look at this amazing Alexander Henry fabric. Sarah from the Wanderstitch used it to sew this stunning summer dress, designed by Gertie as well: the B6094.
The vintage 1930’s McCall’s dress
I don’t have any white garment but this elegant dress of Julie, @csewchicasewww gave me some ideas.
The little black dress from Amalie
Little Black Dress
Neither do I have a (little) black dress. Again was I intrigued by this graceful one made by Amalie. She designed the pattern herself.
Did anything catch your eye this week?

A little cheating for Project SewMyStyle: a pocket skirt

When I saw that the May entry for Project SewMyStyle was a gathered pocket skirt I decided not to buy the pattern from Callie Faye Collection but draft it myself. Why? Because since last September I am following pattern drafting lessons and the scope this year is skirts. I learned to draft a  pattern block for a straight skirt and use this pattern block as a base for all kind of skirt designs. Furthermore, my fabulous teacher stimulates me to draft a skirt pattern myself whenever I see a model that I like.  So I dared myself to do it!

Pocket Skirt

The pocket skirt pattern

Drafting a pattern for a gathered skirt turns out to be rather easy. First I measured the hem of the gathered skirt of a dress that I liked. In this case, my Sureau dress.  To gain the same width I  added 5 cm at the center front and the center back of my pattern blocks. I calculated the proportions of the pockets on the picture. Although they are big enough they tend to look smaller than the ones on the original design. Probably because I lengthened the skirt until the hem was on my knees. So I ended with three pattern pieces: the front, the back and a pocket.

pocket skirt


The sewing process

I used a soft printed cotton chambray from Dress Fabrics. I bought it last September. This fabric worked like a dream.
Because I didn’t buy the pattern I didn’t have instructions for sewing the skirt. So I studied the pictures on the website, relied on my know-how of skirt sewing and made my own instructions!


1. Pockets

Put on the pockets first as they are also slightly gathered. To accentuate the pockets I used the wrong side of the fabric as the right side.

Iron the seam allowances of the pockets and stitch the three seams at 1 cm.

Pin the pockets on the skirt and stitch 2mm from the sides.

Pocket Skirt
The pockets are gathered together with the skirt.


2. Gathers

Make the gathers by stitching two lines in the seam allowance. I use a different thread colour for the front and back to make it easy to pull at the thread.

Mark the center front with a pin and divide the gathers proportional between the two sides.

Stitch with a short stitch length between the two lines to fix the gathers.


3. Waistband

For the waistband I used preformatted interfacing for waistbands. I cut out the length of my waist and here I made an error. The original pattern asks for an elastic in the back waist. So you have to provide the same extra width for the back waist. This I forgot. So I also gathered the back. In hindsight, this made the further construction even easier.

Before sewing on the waistband close the left side seams of the skirt.

Pocket Skirt
View from a strange angle: the back gathers.

4. Blind zipper

Put in a blind zipper. After sewing in one side of the zipper, I close it. Then I make little notches on both sides of the tape at the waistband. This helps to pin the second side of the zipper at the right place.

Pocket Skirt
A perfectly matched waistband

4. Finish

Sew the side seam under the zipper. Finish the waistband and hem the skirt.

Pocket Skirt
Conclusion

I am happy with my pocket skirt. I wore it a lot already. Drafting the pattern myself gave me a lot of satisfaction. It means that I learned something in the pattern drafting lessons. Although I did not buy the pattern suggested by the Project SewMyStyle I sewed the skirt. More, I enjoyed the whole process. That is what SewMyStyle is all about, isn’t it?

Pocket Skirt


Eye-catchers #12

An eye-catcher is a person or a thing that attracts the attention

The online sewing community is very visual. So, every day I see heaps of sewing related images on social media and blogs. Some of them catch my eye because they make me think or they give me inspiration. Here, I want to share these eye-catchers with you.

eyecatcher

Follow below what caught my eye recently. Some of them are garments which other sewists wore during the Me-Made-May’17 challenge.

The Sophie Swimsuit from Andrea

Sophie Swimsuit

I was immediately taken by this stunning version of the Sophie Swimsuit made by Andrea from Fair Fit Studio. I simply love this golden colour. Summer is near and I need some swimming suits. This pattern could be the one.

Not a Primary Color’s Mitchell Dress

Mitchell Dress

I am always glad when sewists I follow alert me to pattern designers I didn’t know before. So did Siena when she showed this gorgeous Mitchell Dress from Paddleboat Studio on Instagram. She did some modifications on the pattern but most of all the way she used the different blocks of the fabric is breathtaking.

Yumi’s linnen blouse

Solid Blouse

One of my reflections of Me-Made-May’17 is that I need more solids and more tops. This kind of linen blouse would be perfect.  I think it is from a Japanese pattern book (?) because the comments on @jpn.winterberry’s IG were all in Japanese. In particular, I love the design of the collar.

Sewvanilla’s shorts

Border Shorts

Lately, I am into border fabric. Look at the dress I sewed for my daughter. More, I printed my own border fabric but I can’t show it yet because it is for my #restylingexchange2017 challenge. So, when I saw this shorts by Sewvanilla I was intrigued by the placement of the border. Very inspiring.

The maxi dress sewed by Mokosha_II

So far I only made one maxi dress. Then I saw this smashing maxi from @Mokosha_II and I immediately wanted to sew another one. Originally it was a Burda pattern but she changed almost everything about it. Also, isn’t that a gorgeous fabric she used. On top of that, this is a great picture too! I l love everything about it.

Did anything catch your eye this week?

MMMay 17 – It’s a wrap!

Me-Made-May’17 is finished! I am happy because I reached my goals: wearing a different me-made garment every day. More, I also pledged to wear at least 10 new me-made’s—sewed between June 2016 and May 2017. I succeeded.
I already wrote about the first half of my MMMay 17. Below, I’ll tell you about the second half and some further general observations.

Me Made May 17
31 May 2017, my husband repaired an old little bench and I am wearing me- made’s.
New garments

MMMay 17 overview

Two Rushcutters — In the Folds  //  Simplicity 1355 // Daphne Day Dress —Sew This Pattern


MMMay'17

DKNY Vogue 1349 // Toaster Sweater #2 — Sew House Seven // Nanöo Top and Brooklyn Skirt — Seamwork

Old garments

MMMay'17

New Look 6106 // Seafarer Top — Sew Much Ado and Versatile Wrap Skirt  — Make it perfect // Crepe Dress — Colette
Zippy Top — See Kate Sew and Skirt from Allemaal rokjes // Box Pleat Skirt from Allemaal rokjes // Rachel Wrap Dress — Maria Denmark

Some observations about the second half of MMMay

There are only little changes in my observations in comparison to the first half of MMMay.

  • Still a LOT of prints! I definitely have to sew some solids.
  • A variety of colours.
  • No repeats, at all.
  • An eclectic style.
  • We had some ‘tropical’ weather so I was happy to wear my Summer clothes.
  • Two old rtw-tops. The others I made myself.
  • Taking a picture of yourself every day is quite confronting.
  • I enjoy the challenge to search my wardrobe every day to look for a new me-made!
Conclusion

I enjoyed MMMay’17. I am thrilled that I am able to wear unique me-made clothes 31 days in a row. On top of that, I’m really pleased that half of them are recent makes. Though I must confess that I didn’t wear some of the old makes since last May, I was happy with the excuse to wear them again.

This challenge also makes me reflect on my wardrobe. There are some gaps:
*  tops
*  trousers – I only wore some comfy pants last month
*  garments in solid colours
*  an in-between seasons coat or jacket
*  bra’s

MMMay'17
My Me-Made-May’s from 2017

It was also fun and inspiring to see all the beautiful makes from other sewists on Instagram and on the blogs. Again I met some new amazing and creative people.

I am already looking forward to MMMay 2018!

MMMay 2016
My Me-Made-May’s from 2016.

The Vogue DKNY V1235 Dress

A year ago my daughter announced that her best friend was going to marry and she was going to be the master of ceremony.  This occasion asked for a new and special dress, of course. As I love to sew for my loved-ones I was happy to sew one for her. Even though I knew a year in advance, the dress was ready half an hour before she had to leave for the ceremony. More, I had to sew in my sewing attic, on the hottest day of May so far. But I finished the DKNY V1235 and I love it!

Vogue DKNY V1235

The Vogue DKNY V1235 Dress pattern

I found this pattern in the bargain box of my local fabric shop around New Year. I knew immediately that this would be the perfect pattern for my daughter’s master of ceremony’s dress. It ticked all the boxes: a fitted bodice, a v-neck, a loose-fitting skirt, a sexy vibe and suitable for knits.
This is my second Vogue DKNY pattern. Last year I sewed the V1349 and I had some fitting issues. So this time I carefully compared all the measurements. It is very handy that on the Vogue patterns the finished garment measures are indicated on the pattern pieces on the bust, waist and hip points. Based on these and the body measures of my daughter I decided to cut out a straight 24.

Vogue DKNY V1235

The fabric

This lovely fabric is ‘Black Floral Vines on Dusty Jade Border Cotton Jersey Blend Knit’” from Girl Charlee UK. My daughter picked it herself last November. Unfortunately, this fabric is sold out now. I wished I had bought more then because I wanted to use it for my Moneta dress but my daughter wouldn’t let me. At the end, she was right to keep it for this dress.
For the first time I worked with a border pattern and I had this asymmetrical placement in my head before cutting the fabric. I am happy with how it worked out. More importantly, my daughter adores it as well.

The instructions say that this pattern is only suitable for two-way stretch knits and this border fabric has only a one-way stretch—from border to border. So this was ok for the bodice but not for the skirt. Thus I made a muslin of the skirt in a woven fabric and it fitted perfect. I did not have to make any alterations.

Vogue DKNY V1235

The sewing process

The accompanying instructions for the DKNY V1235 pattern are clear and illustrated with drawings. Although everything seemed logical I did not follow all the steps.

  • I did not use elastic to gather the shoulder straps but just gathered them with two lines of stitching.
  • I sewed the shoulder straps between the back bodice and the facing instead of sewing them on the back.
  • A zipper was not needed! The bodice has enough stretch to put the dress on and off without one.
Vogue DKNY V1235
My first FBA

Because of the fitting issues I had with the previous Vogue pattern I first made a muslin in a comparable stretch fabric. As assumed, the front pieces did not cover the whole boobs. Which meant my first Full Bust Adjustment was in order.
A quick search on Google gave me a very good explanation and tutorial from the Curvy Sewing Collective. Only my pattern piece had no darts. Then I found the tutorial from Jennifer Lauren on how to do a full bust adjustment for fitted knit patterns. The combination of these two guides and my pattern drafting lessons gave me the confidence to draw my first FBA.
I sewed a second—now wearable—muslin and it came out perfect.

Vogue DKNY V1235

Is this a quick sew?

No, the DKNY V1235 is not a quick sew. The tucks and the gathers in the bodice front and the creases in the front skirt take their time.  I basted all the marks to sew them neatly. It also took time because I needed two muslins and an FBA to get the fit right.

Vogue DKNY V1235
Basted marks of the tucks.
Conclusion

Sewing this DKNY V1235 dress was challenging and fun. It gave me a satisfying feeling that I could bring it to a good end. More, that my daughter was happy and proud to wear the dress to the wedding of her best friend. Will I sew another? Yes! I still have to finish that second wearable muslin. It is a mustard yellow knit and my daughter is looking forward to it. The question is: will she have to wait another year for it?

Vogue DKNY V1235
In front of the d’Ursel Castle where the wedding took place.