The Seamwork Jill Coatigan with striped lining

Sometimes you see a new pattern and in your head, it immediately links to this particular fabric you have in your collection. You simply have to make it. The project jumps to the pole position of your sewing queue. This happened when I saw the Jill Coatigan in the December Issue of Seamwork Magazine. It matched perfectly with this fuzzy charcoal knit I had in my collection. I just had to sew one immediately!Seamwork Jill Coatigan

The Seamwork Jill Coatigan pattern

There are 5 pieces in this pattern, which is not much for an outerwear garment. Nevertheless, I printed the A0-format of the pattern at the copy shop. The pieces for a coat are always large, aren’t they? I was not going to tape them together. Based on the finished measurements I cut out a straight L, and did not make any alterations. The fit is perfect!


The fabric

I bought this fuzzy charcoal jersey at the Neuköllener Stoff in November 2016. When I saw it at the market I had something ‘coat-ish’ in mind for it.
Then happened what usually happens when I combine a new pattern with a piece of fabric I have in my collection: ‘I don’t have enough’! I only had 2 meters and the charts asked for 3,6 meters. So I pulled out all the tricks I have to get the Jill coatigan out of this piece of fabric because now I had this picture in my mind and no other fabric would do. Luckily the fabric is very forgiving so I could place some pieces in different directions. Further, I omitted the vent and placed the center back at the fold line. To make the Tetris work I also had to cut the facing in two parts. Due to the fuzziness of the fabric, you don’t see this at all.

Teamwork Jill Coatigan
No vent at the back.
The striped lining

In Belgium, winters can be cold and windy. Although the fabric is a rather heavy jersey it needs a lining to make it a warm coat. I remembered I had a pin on my Pinterest from a self-made black & white lining that I wanted to make myself for a long time. This would be perfect for this coat and not difficult to make. I cut several strips of 24 cm and sewed them together. For the sleeves, I used the plain black lining.
To cut the lining I used the depth of the vent for the back pleat. This pleat is necessary to be able to move when the lining is sewed in. On the front pattern piece, I outlined the edge of the facing, cut it out and used the rest as front pattern lining piece. Further, I put an extra 3 cm seam allowance on the bottom of the coat and sleeve pieces. This to give more free movement when wearing the coat.

Seamwork Jill Coatigan
The front piece of the lining.
The sewing process

Sewing the Jill Coatigan is easy. It could also have been a quick project but I took my time with some parts. I hand-sewed the pockets on the front because I don’t like a topstitched seam on this fuzzy fabric.

Seamwork Jill Coatigan
Hand-sewing the pockets.

That’s also the reason why I didn’t make buttonholes. I sewed black fold-over elastic in two and stitched the loops between the front and the front facing. To make it a wearable coat for me—I have to be able to wear it on my bike—it needed a closure. I found the two giant grey buttons in the bargain box at my local haberdashery store.

Further, making the lining and sewing the lining also took some time. I sewed the lining in with the machine and hand-sewed the seam. Through the whole process, I never came up against any obstacles. The instructions are clear and it was a joy to sew.

The black pleat in the lining gives you free movement.
Conclusion

I love my Jill Coatigan. Although with the lining and the buttons it is more a coat than a coatigan. I’ve been wearing it for more than a month now and it is perfect for the colder and windy weather. Also, the closure works perfectly when I am cycling. Another bonus is the pockets. They are perfect for putting in my gloves and keys. So, me and my Jill Coat are very good friends.

Seamwork Jill Coatigan
The Jill Coat paired with the original 1952 J.R. Bauman dress form I received from my sister-in-law, Linde Ergo.

I ❤️ the Bombazine oven mitt

It started with a joke. On a family pizza night, our daughter exclaimed that she would give us some oven mitts as a Christmas present. Because she burned herself by pulling out the pizza’s and we didn’t have mitts. “That’s not necessary” my husband answered out of the blue, “because your mom—that would be me— just sewed one for everybody!” I sighed: “Oh baby, now you’ve spoilt the surprise.” Everybody laughed of course, little did they know I hadn’t sewed any oven mitts at that point. A few days later I discovered the Bombazine oven mitt on their site. Now I laughed too because no longer I had to search for my Christmas gifts. So that’s why I sewed 11 Bombazine oven mitts.

Bombazine oven mitt

The Bombazine oven mitt pattern

The Bombazine mitt pattern is a free downloadable pdf-pattern. It only has four pages: two with instructions and two for the pattern. So you print and tape together the pattern in a blink of an eye! You use the same pattern piece for the three layers of the mitt. Simple and easy!

Bombazine oven mitt


The fabric

The Bombazine mitt is THE project to use up your leftovers. I used a combination of leftovers from sewing projects, pieces of old jeans of the kids, and pieces of fabric from the thrift shop. I sewed together some of the scraps with a medium weight and then I cut out the outer pieces.

Bombazine oven mitt

For the heat insulation layer, I used an old woollen blanket. Bombazine oven mitt

For the inner lining, I used leftovers from cotton fabric.Bombazine oven mitt

The sewing process

Sewing the Bombazine mitt is a joy! The instructions, with designs, are very clear and easy to follow.
New for me was hand quilting the layers together with sashiko stitches. I have never done this before but I love learning new techniques. The stitches are still wonky but I like doing it.
Bombazine oven mitt


After sewing the outside of the mitt, you sew together the lining but you leave a gap near the top. Later you pull the outside layer of the mitt through this gap.
Sewing together the three layers can be a little difficult. When an opening of a pattern piece is small I always sew on the inside. This prevents sewing accidentally wrong layers together.Bombazine oven mitt


According to the instructions, the trickiest step would be bagging the mitt (or ‘mitt birthing’). I found this not so difficult. The woollen layer is easy to handle and pull through the gap.
After the birth, you finish with topstitching the edge of the mitt and a good press.

bombazine oven mitt
‘mitt birthing”
Bombazine oven mitt
These mitts need only the finishing topstitch of the edge.


Conclusion

I enjoyed myself tremendously sewing these mitts. Due to the great design and the easiness of the sewing process, they came out fantastic. And giving them as a Christmas present was pure fun. Everybody had a laugh and they were very happy with them.

Will I sew more Bombazine mitts? Definitely! They will also make a perfect 2018 Secret Valentine gift.
So thank you Bombazine ladies for this cute free pattern.

Bombazine oven mitt Bombazine oven mitt Bombazine oven mitt


Top 5 of 2017: reflections & goals

The final part of the Sewing Top 5 Series: Reflections and Goals

sewing overview reflections goals

Reflections

sewing reflections goals

Some, not 5 though 😉, thoughts about my sewing in 2017.

*Deadlines

The common thread for my sewing last year would be sewing against a deadline and not reaching that deadline. That’s no fun because often it left me with an unsatisfied feeling or even with unfinished projects, like the Carolyn Pajamas Dress.
How did I keep ending up there? Because I want to sew everything for everybody and for myself: birthday presents, Christmas presents, party clothes, … Plus, I love to participate in all these exciting sewing challenges the sewing community launches. This was infeasible and led to situations that I was still finishing the party dress for my daughter 5 minutes before she had to leave. So, I had to stop myself making all these sewing promises. In fact, this happened naturally because I lost my sewing mojo last fall. In hindsight, I think this was the underlying cause. The last part of 2017 I did not make any more promises and I feel more confident about my sewing now.

*Sewing classes

Sewing class

In September 2016 I started a pattern drafting course for a year. Here I learned to draft my own pattern blocks for a skirt and trousers using the method of M. Müller & Sohn, aka the Rundschau method. These lessons are intense but they also taught me a lot. I enjoyed it so much that this September I started the second year: drafting a basic pattern for a dress. More, I also started another sewing course: couture techniques. This year the focus of this course is sewing pockets. So every Monday I have now 7 hours of sewing lessons and I love it.

*Sewing is a verb

This is the most important insight I gained last year. Sewing takes time and when you take your time for it,  you get smashing results. Take your measurements with care, control the finished measurements on your pattern, maybe make a muslin, baste tricky seams, do some fitting and make the needed adjustments, etc….  This year I learned to enjoy doing all these steps and leave the quick-sew road behind.

*Sewing blogger

I started this sewing blog a year ago and I don’t regret it. Okay, it is some work and there are already a lot of sewing blogs but it made my connection with the sewing community stronger. That’s why I am going to keep on blogging. I wrote all this in my one-year anniversary post.


Goals

sewing reflections goals

*Sew 300 times a year

The first criteria for setting goals is: “Be realistic!”. That’s why want to sew 300 days a year instead of every day. I’m lucky to have my own sewing room so I can easily start sewing most of the days, even if it is only for fifteen minutes. To keep the score I mark my sewing days on the Sew DIY sewing calendar. (How nerdy can you be?)Counting my sewing days

*Make no sewing promises

Like I wrote above I will not make sewing promises anymore. This does not imply that I won’t sew for other people. No, I am still going to do that but without outspoken promises. Also, I still am going to participate in some sewing challenges but I will be more selective.

*2018MakeNine

What am I going to sew in 2018?  A variety of garments I hope, but certainly bra’s. The attentive readers of my blog may be a bit skeptical here because I said this also for 2016 and for 2017.  Indeed, the Watson Bra was on my 2016MakeNine and on my 2017MakeNine.
Even though I sewed 40 projects in 2017 I only made two garments of my 2017MakeNine: the Paxson sweater and the Hudson Pants for man.
But I still like the not yet sewed patterns of 2016 and 2017 so I decided to keep them on my 2018MakeNine. The new ones are:
*The V9075 Jumpsuit
*The Ellsworth Coat – Christine Haynes

2018MakeNine
2018MakeNine

I wish you all a very inspiring sew year!

°°°

Read more about The Sewing Top 5 series: Hits, Misses and Highlights!

Top 5 of 2017: the misses & the highlights

Following Gillian in her Sewing Top 5 series, next up are my misses and highlights of 2017.

sewing top 5 misses highlights

It’s a bit strange to make a podium for your misses, isn’t it? You don’t want to honour them but would rather forget them. On the other hand, you learn something from your blunders. That makes them a kind of necessary evil for improving your sewing skills. In no particular order are here 5 of my misses:

1 The Bridgetown backless dress from Sew House SevenThe Bridgetown backless dress from Sew House Seven

What went wrong? First, I cut the sleeves cross grain because I thought the stripes would give a nice effect. On the contrary, this made them pop up instead of falling on the arm. Second, the fabric was somewhat too stiff to give the dress the needed drape. Third, there was not enough ease around the hips. I should have looked better to the given finished measurements. I never wore it.
What can I do with it? Restyling it into another garment will be the only solution for this dress.


2. The Saunio Cardigan from NamedSaunio Cardigan Named

What went wrong? What was I thinking using a woven fabric when the pattern asked for a knit. It could have turned out ok if I’d made the arms a bit wider. Now they are at their narrowest. I wore it a few times but I’m not really comfortable with it.
What can I do with it? Perhaps I should make a belt for it as Jessica did. Otherwise, it is also going to the restyling pile.


3. The Carolyn Pajama DressCarolyn Pajamas Dress

What went wrong? This Carolyn Pajama Dress hack was supposed to be my entry for the ‘Sewtoghetherforsummer challenge.’ Unfortunately, I didn’t reach the deadline of 21st of June to finish it. Now, it is still laying there on my WIP-pile.
What can I do with it? Finish it! It’s cut and I have all the needed notions.


4. The Skeleton PJ’s for my godsonSkeleton Fabric

What went wrong? I promised my godson PJ’s for his new year’s present but I only managed to finish the pants on time. Hence he received a PIP—Present in Progress. He tried them on and they were on the small side. I could solve this by putting a band on the side seams. I had also already cut the pieces for the top so probably these will be on the small side too. In fact, in the rush to get the present ready on time, I used a too small pattern for his measurements. I made some alterations on it but it was a lost cause. Now, almost a year later, he has grown more than 7 cm so the PJ’s are not usable anymore.
What can I do with it? Use the pieces for a PJ for a smaller child.

5. Turning my WIP’s in UFO’s

I started 2017 with 6 WIP’s—finished two— and I ended it with 4 UFO’S.

  • Duffel bag to use for pattern drafting class
    Started in September 2016
    I cut all the pieces and bought a zipper
  • Boxer shorts for my sons
    Started in September 2016
    I cut all the pieces and made a mistake: the front and the back have different colours from the same fabric!
  • Paxson for my son
    Started in December 2016
    Cut all the pieces
    I put the sleeves with the wrong side of the fabric up!
  • Hudson pants for my daughter-in-law
    I made 7 Hudson pants for my family’s New Year’s present. Unfortunately one for my daughter-in-law was too small.

What can I do? Finish all of them!!


sewing top 5 misses highlights

Life isn’t only about sewing! Or, is it? So here are my highlights of 2017.


1 Podere Santa PiaAbout ten years ago we bought a holiday home—Podere Santa Pia— in the South of Tuscany, Italy. It is our heaven on earth. Going there as much as my working schedule allows is truly a highlight of my life! More, I can also sew there and that makes this place even more of a paradise.
Every time we visit Podere Santa Pia, or we have friends or family visiting us we take a goodbye picture. You can see them all on Instagram with #ciaosSantaPia.


2 Spending time with my familyWe have three, now adult, children and I love them and their significant others to pieces. We installed a tradition to make pizza’s on Sundays, when we are at home. These are great nights.


3 Quiet days with friendsEnjoying a “quiet day” at the Martin Creed show at Museum Voorlinden.

We have a more than 35-year long during friendship with another couple. More than 15 years ago we decided to no longer give each other material gifts for birthdays. Instead, we give each other time. We call this “our quiet day”, which we organize for each other several days a year. This can involve visiting an exhibition, or a historical place and have a nice dinner together. When this “quiet day” is in Podere Santa Pia (see highlight 1) the joy is double.


4 City trip to London
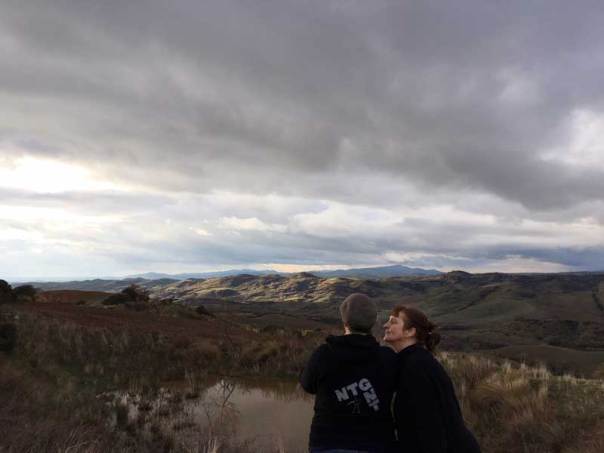
My husband had a business meeting in London last May and we took advantage of it to stay there for 4 days. It had been 15 years since we visited and we were excited about the renewed acquaintance with this fantastic city. Totally new for me now was the discovery of the famous Goldhawk Road, THE fabric shop street. Strolling around in this street and, of course, buying fabric was the crowning point of this trip.


5 Nick Cave concertI don’t often go to concerts anymore. This year I only went to two: Bob Dylan’s Never-ending Tour and Nick Cave’s Skeleton Tree Tour. Both of these concerts were amazing but I was totally blown away by Nick Cave. This was so heartfelt and moving, and at the same time energetic and diabolic. The best concert I’ve ever experienced.


Next Up in the Sewing Top 5 series are the reflections and the goals.


4 reasons to participate in the 2018 Secret Valentine Exchange

Woohoo!! The 2018 Secret Valentine Exchange is back. I love this “sewing-community- handmade-gift-swap” so much that I give you—again—4 reasons to participate. I wrote this blog post exactly one year ago for the 2017 Secret Valentine Exchange but everything is still true!

2018 Secret Valentine Exchange
Design made by Sanae

The  Valentine Exchange is a non-conventional handmade gift swap that occurs worldwide. It’s the fifth time it takes place and it is organized by two very creative and inspirational women: Sanae from Seattle (US) and Ute from Berlin (Germany). You can read more about the exchange on Sanae’s blog.
In 2016 I participated for the first time and it really was a heart-warming experience.

Here are my 4 reasons why you should participate as well!

1 You get to know new people

  • Like I said before, the hosts, Sanae and Ute, are amazing people to meet.
  • Then you meet your assignment: the person you have to make a gift for, in my case, that was Elle from the UK. I received an email from the organizers with some information and her IG-account for inspiration.
  •  And of course, at the end, you get to meet the person who made something for you. Last year Angela from Oakland was my Secret Valentine.

2 You get challenged

The purpose of the SVE is to make something yourself with barely any costs, to use materials from your stash. I learned that Elle’s favourite colours were: grey, navy, gold, and mustard. Luckily I had some scraps in my stash of these colours.

Grey and mustard scraps from my fabric stash

Then you have to let your creativity work. Elle is a great sewist, so I decided to make some pattern weights and a bag for putting them in. I used the open wide zippered pouch pattern from Noodlehead for it.

The pattern weights are filled with lentils
The open wide zippered pouch from noodlehead

I pimped it with some cuberdons, a famous sweet from Ghent, my hometown.

3 You get thrilled twice

  • It is very exciting to send a gift to someone and have to wait to receive their response, whether they liked it or not. Elle expressed her thanks extensively and still does, and every time I get warm and fuzzy all over again.
  • It is also very exciting to receive your gift, especially when it comes from overseas and when it is beautifully wrapped gift containing a block print of David Bowie on a white canvas bag. I use it all the time because I love it so much.

4 It is very easy to sign up
Just fill in the Google form. The deadline is  Wednesday, January 10th, so you have still a few days. You don’t need to have an online presence to participate. You just have to let your creativity work!

Are you participating?

** I also posted about my 2017 Secret Valentine Exchange **

What I sewed in 2017-Top 5: the hits

There are two reasons why I love a new year. One, you can start a lot of things with a clean slate, and two, you can look back and reflect on the past year.
Like last year I collected all my sewing data in an infographic and here below you see the result of my 2017 sewing!

2017 sewing

What do these numbers say?

In one sentence: I sew for women, using a pdf pattern from an Indie Pattern Designer. No drastic changes here in comparison with last year.

40 sewing projects

These 40 sewing projects are all finished ones. (I may have a few UFOs also). That’s one less than in 2016. Like last year I am a little disappointed with this number because I have this irrational idea in my head that I want to sew something new once a week. I knew I didn’t succeed at this because last September and October I totally lost my sewing-mojo.


Top 5 of 2017

I am joining Gillian from ‘Craftingarainbow’ for the #SewingTop5 of 2017. It’s already the 5th time she launches this annual blog series. Like she says: “It’s a chance to review what worked or didn’t, celebrate the highlights, reflect and get some goals for the next year.”  All the things I like about starting a new year.  So, here I start with my Top 5 Hits.

Top 5 Hits

My hits are sewing projects that gave me the most joy. This joy can be derived from various sources: from the pleasure of wearing it, the challenge of the sewing, the first time of tackling that particular technique, or the gratitude you receive from the person you sewed for…

Here are in random order my 5 Hits of 2017.

1. The Vogue DKNY  V1235 Dress
The Vogue DKNY V1235 Dress1. The Vogue DKNY  V1235 Dress

I sewed this dress for my daughter to attend the wedding of her best friend. I worked very hard on this dress: I made two muslins for it and executed my first FBA—that still sounds like a medical procedure ;). It was also the first time I sewed with border fabric. I love how the placing of the border I had in my head came out. My daughter received a lot of compliments on the dress and she loves wearing it. This makes me sew happy!


Toaster sweater 2 Sew House 72. The Toaster Sweater#2 from Sew House Seven

Thanks to the SewMyStyle project I sewed this Toaster Sweater and I am so glad I did. It was a quick sew with instant gratification. I wore it a lot and I would never have thought that I could pair it with a variety of clothes, old and new ones, like the A-line skirt and the plissé skirt.


Chari Dress Schnittchen Patterns3. The Chari Dress from Schnittchen Patterns

I was a pattern tester for Schnittchen Patterns new collection and though I am not a ruffle kind of girl, I’m glad I picked this pattern. It turned out that ruffles could be stylish for me.
This dress also proved to be the ultimate summer dress when we had temperatures around 40°C last August. So, no surprise here that I wore it A LOT!


restyle refashion4. The restyling of a men’s shirt

Wow! This project had several firsts for me! I never restyled/refashioned something before and I never hand-printed fabric. I succeeded in both new skills and I am very proud of the result. Extra exciting was that this project was for the First Restyling Exchange. So it was not for me but for Elisabete, who sent me her husband’s shirt and received a top for her. It was thrilling to wait whether the top would suit her and if she would like it. I got two yesses!


plissé skirt Lotte Martens5. My Plissé Skirt

I only sewed this skirt on Christmas Eve but it feels like my best sewing project of 2017. The fabric is exquisite and it took only half an hour to transform it into a skirt. More, I feel like a queen when I am wearing it. A fabulous project to finish my 2017 sew year.

Next up are  Misses & Highlights, and Reflections & Goals.


1 year of blogging

1 year of blogging

Exactly one year ago I pushed the publish button of this blog for the first time and herewith I entered the blogosphere.  Not that there weren’t enough sewing blogs already but I wanted to share my personal sewing stories. Although I was pretty nervous—would someone out there ever read it?—I also felt very excited. Especially when I received positive and supporting comments. So today I am celebrating 1 year of blogging and…

one year of blogging


1 year of blogging = 55 posts

I published 55 posts! That’s more than once a week.  While they are all sewing related, I don’t have a fixed format. Most of the time I write about the garments I sewed. Three of them: The Daphne Day Dress, The Chari Dress, and The Laneway Dress were pattern reviews and I loved the combination of sewing and reviewing.
In February I started the Eye-catchers series and this series worked really well. I got a lot of positive comments on it and it gave me heaps of sewing inspiration. I absolutely am going to write more Eye-catchers.
Writing a guest post for the Sewcialists blog was also a fun experience. After two years of inactivity  Gillian from ‘Crafting a Rainbow‘ reanimated this blog. I am glad that I could contribute with a piece about sewing bloggers who inspired me.

4 most read posts

I love some statistics so I consulted Google-analytics and found my most-read posts. The result doesn’t  surprise me.  In fact, they cover my different types of blog posts.

Eye-catchers #18

what I sew: one year blogging


The striped nanöo top

what I sew: one year blogging

The Laneway Dress

The refashion of a men’s shirt

What is not so good about having a sewing blog?
It’s time-consuming

Creating content, making and editing photos, this all takes a lot of time for me. Also because I am writing in English, which is my second language. Sometimes I think: “ Wouldn’t it be better to sew instead of blogging!”

 Feeling guilty

When I haven’t posted for more than a week I start to feel guilty. I tell myself that this feeling is unnecessary because blogging is a fun hobby and it should stay fun, not an obligation. Alex, from Sewrendipity, wrote about this guilt feeling too.

Still, I think the good vibes that blogging brings are stronger than the negative ones, so I am going to continue for at least another year!


Thanks

A huge thank you to my daughter for editing all of my posts, and to my hubby for taking almost all of the blog photos.

Maremma love
Mother & daughter in the Maremma, my favourite place on earth. Photo was taken by my husband.


And of course enormous thanks to you readers all over the world. Because without your support this blog would have no sense at all.

xxx

How to make a-made-in-a-blink festive skirt

Plissé Skirt

Two days before Christmas it looked like I wouldn’t have a new garment for the annual family Christmas dinner. That’s nothing new because last year I didn’t sew one either. Then I went to ‘De Stoffenkamer’ to buy some fabric for presents when this lovely black plissé caught my eye. Immediately, the image of a new skirt—a plissé skirt— popped up in my mind. More, this was going to be a very easy sew, so I bought the fabric right away.

A plissé skirt: how did I do it?

A panel of plissé fabric

Lotte Martens Fabric

The black plissé panel is from Lotte Martens, a Belgian fabric designer. In fact, it is a semi-plissé, which means the pleats aren’t as deep as in a regular plissé. The panel is hand printed with a Bremen gold design. This is Lotte Martens’ trademark. She hand prints all of her fabrics and you know that I love hand printing. Since long I yearned to sew something with a Lotte Martens fabric.

This plissé fabric also reminded me of my visit to the Fortuny Palace in Venice for the Biennale 2015. There I learned that the plissé was invented by Mariano Fortuny, a Spanish fashion designer who lived in Venice. He opened a couture house in 1906 and continued until his death in 1946. Fortuny rebelled against the fashionable styles that were popular during his time. Together with his wife, Henriette Negrin, who was an experienced dressmaker, he created the Delphos gown in 1907. The Delphos gown is a shift dress made of finely pleated silk weighed down by glass beads that held its shape and flowed on the body. The pleating was all done by hand and the process was kept secret. Today these dresses are seen as works of art and many survive, still pleated, in museums and personal collections. (Source: Wikipedia)

Delphos gown
On the left: Clarisse Coudert, who married Condé Nast, wearing a Fortuny tea gown. ca. 1909 – On the right: (Isadora) Duncans three adopted daughters (Lisa, Anna, and Margot) in Delphos dresses c.1920
One side-seam

The panel is 70 cm with a 150 cm fabric width. For this type of skirt, you don’t need a pattern. Double the fabric, right sides together, pin and stitch.

The elastic waistband

Measure a piece of broad elastic around your waist. Sew the ends together to create a circular form.

Divide the waistband and the skirt into four even parts and mark them with chalk and/or pins. Now pin the waistband to the skirt. I placed the side of the waistband with the mini ruffles atop the top of the skirt. This makes the stitching of the elastic easier.

The whole sewing process took me about 20 minutes.

Conclusion

We had to leave for the family party at twelve and I finished it at 11 o’clock! I love wearing it and I got a lot of compliments. Who doesn’t like that?!

Will I make more plissé skirts? When I find the right plissé fabric I probably will. Or maybe another type of garment like the Fortuny tea gown. Who knows?

My TNTs – Tried and True patterns

The November theme of the Sewcialists is TNT patterns.  One of the purposes of this theme is to show the patterns that you tried, several times, and that you love. You can either share them on Instagram with the #SewcialistTNT or tell about them on your blog. (At this moment you have still one day for it!)
So I dove into my sewing archives and discovered that I had several TNTs.

My first TNT patternTNT Tried’N’True patterns

In 2013, after a sewing hiatus of more than 20 years, the first pattern I tackled was the A-line skirt from the book  Allemaal rokjes from Mme ZsaZsa  (You can translate the title as A whole lot of skirts !).  After sewing this skirt I felt the joy of sewing something for myself that has a good fit. The feeling was so strong that I immediately sewed some more of the same skirt. For myself and for my daughter.

allemaal rokjesIt is always the same pattern but some have more flare and others have a box pleat at the front.

Why sewing a TNT pattern?
  1. You save time
    The fact that you have already a traced and maybe an adjusted pattern saves you a lot of time. This is a big win for me because I am tall and I have to lengthen all my patterns.
  2. You professionalize
    Every time you sew a pattern that you sewed before you improve your sewing techniques. Well, after sewing in about twenty blind zippers in your skirts, I can do it with my eyes closed ;).
  3. You can vary a lot
    You can use another type of fabric for the same pattern. You can make small changes like lengthening the sleeves or the hem. Small decisions that bring a lot of variety to your wardrobe.
  4. You have joy
    Sewing a garment more than once gives joy. When you are sewing it you know already that the fit will be good, how it looks on you and how you feel in it. That makes that you have a smile on your face while you are sewing it because you know the outcome will be great.

Look below for some patterns that are my TNTs. For me, a pattern is a TNT when I sewed it at least three times.

The Hudson Pants from True BiasHudson Pants True Bias

The most loved and worn comfort pants in our family. I sewed several for whole my family.

The Odette Dress from BluegingerdollOdette dress

I sewed all three of them in a knit fabric. That makes them secret pyjamas.  And you don’t have to sew in a zipper on when you use a knit fabric, win-win.

The Brooklyn Skirt from Seamwork

Same skirt and the same pattern with no changes, but three different types of fabric giving three different looks.

Ogden Cami from True Bias

The same pattern in three different lengths. This cami and dresses gave me so much joy in the scorching heat of last summer.

Future TNTs?

Will I sew some more variations of above TNT patterns?
I don’t have a crystal ball but it is possible. But, more likely it is that I create new TNTs.
And you? Have you some (favourite) TNT patterns?

The A-line skirt that brought my sewing mojo back!

After going on holiday, I think my sewing mojo went on a holiday as well. I don’t know how it happened but I didn’t touch my sewing machine for more than a month. I just couldn’t bring myself to sew. Then I remembered how long it had been that I sewed a skirt for myself. Although I have several WIP’s gazing at me I went for a new A-line skirt and it gave me back my sewing joy!
A-line skirt

The A-line skirt pattern

When I was wearing the Laneway Dress from Jennifer Lauden I noticed how nice the design and the fit of the skirt felt. I love the A-line and it has pockets. The decision to use this pattern for the skirt was quickly made.
The pattern didn’t need any modifications. For the dress, I had lengthened the skirt with 5 cm but I took it back to the original length. The fit was good so I let it fall on my natural waist.

The fabric

A few months ago I got a bag with fabrics from my sister-in-law; all from unknown origin and unknown composition. This small piece is probably upholstery fabric. It is medium weight and both sides are useable. I opted for the side with the dark background and blue-ish flowers. I love that it has some art nouveau vibe. The fabric feels a little rough that’s why I lined the skirt with some green lining that I had left from sewing my husband’s jacket.

I had only 1,10 m of this fabric so I could not place the front and the back piece in the same direction.

Luckily the line of the drawing is not that strong so you have to look really closely to notice that the front and the back are not in the same direction.

The sewing process

Sewing this skirt was easy and quick. Having sewed already more than 20 skirts the last years I had no difficulties putting this one together. However, for the pockets, I followed Jennifer Lauren’s method and it proved again to give very neat ones.

For the waistband, I used preformatted interfacing band, a handy prop. This band has three punched lines to make it easy to sew it on and fold it over.

A-line skirt
Lining, waistband, skirt and neat pocket. Also, that’s not a tuck between the lining and the waistband but a loose thread!

Conclusion

I love this A-line skirt. Not only for making me happy when I’m wearing it but also for bringing back my sewing mojo. Give me more of these kinds of skirts!

A-line skirt