Tag Archives: sewing

The Beryl Bomber Dress from Named Clothing

The seed for sewing the Beryl Bomber Dress was planted during Sew My Style 2017. The chosen pattern for  December 2017 was a pattern from the then not yet launched Named Clothing AW17 New Collection. Although I gave up the Sew My Style challenge,  I kept following it on IG and blogs. So, when Named Clothing launched their AW17 Collection, it was the Beryl Bomber Dress that caught my attention. I love the design of a bomber jacket and I find it very clever of Named Clothing to use this design and turn it into a dress! Then it only took me nearly a year to sew one for myself!

Beryl Bomber Dress


Bomber Jackets

Whenever I think about bomber jackets this photo of ca. 1944 comes to mind. It’s a group of Women Airforce Service Pilots leaving their B-17. Look at their cool bomber jackets! And they named their B-17 “Pistol-Packin’ Mama”!Beryl Bomber Dress


The Beryl Bomber Dress pattern

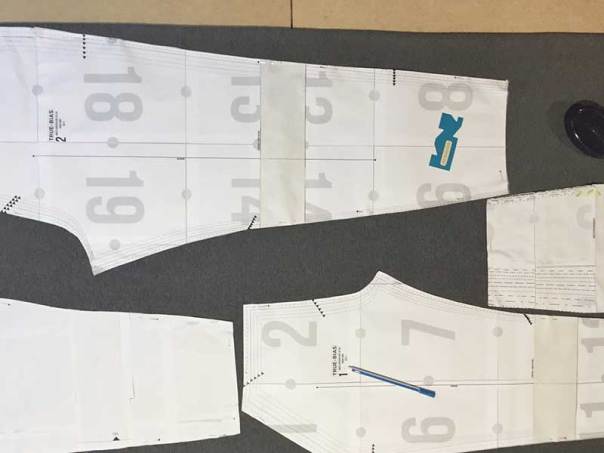
The Beryl Bomber Dress pattern consists of 9 pieces. As I planned to sew the dress I ordered a printed A0 pdf-pattern at Patternsy. This was my first time I used this platform and I was 100% satisfied. You upload your pattern, they email you the price and if you agree, they print your pattern on very usable tissue paper. And it only takes a few days!

Beryl Bomber dress
I love the decorative loop at the back.

Based on the finished measurements I cut out size 46. I lengthened the sleeves with 4 cm (2 cm under the biceps line and 2 cm under the elbow line).  Further, I lengthed the hem and the facing with 4  cm.

Beryl Bomber Dress


The Fabric

I bought this fabric at my small local fabric store. It’s a knit of medium weight with an unknown composition. The fabric salesman in this store is a man of few words. So when I asked about it he just shrugged. I was attracted to the combination of the colours and the black design lines.
Somehow I thought that I needed a knit for the Beryl Bomber dress but after reading the instructions thoroughly I discovered this wasn’t the case. Luckily this fabric has only a minor stretch percentage so it worked out well.
One downside of this fabric is that threads are easily caught on desks and chairs. So I don’t know if the dress is going to lead a long life???

Beryl Bomber DressFor the collar and sleeve cuffs, I used a strong black rib knit with small golden speckles.

When I started to cut out the pattern pieces I became aware that I had to do some stripe matching! You wouldn’t say it at first glance when you see the fabric. But when the seams were a little askew it disturbed me a lot. So, I cut out the pieces on a single layer of fabric.

Beryl Bomber Dress

The sewing process

The sewing of the Beryl Bomber dress was fun. Sewing the collar and the zipper were a bit challenging but I liked it. The instructions are clear with crisp designs. I followed them for about 90%.

As I worked with a knit fabric I used my overlocker for all the seams. I machine basted (stitch length 5) the collar and finished it too with the overlocker. To reach a perfect fabric matching I hand basted the zipper and the pockets.

Beryl Bomber Dress


Conclusion

I’m very, very happy with my Beryl Bomber Dress. I wore it a lot already for several occasions. It’s extremely comfortable, due to the knit fabric I guess. I wore it during a two-hour flight and it never felt uneasy.
Will I sew more? I hope to. Also because my daughter and daughter-in-law expressed their enthusiasm for this model and design. Now, I just have to find some time (an old story I know!).

Beryl Bomber Dress

How to sew 7 Hudson Pants and a mini-one!

I got this idea—sewing matching Hudson Pants for my family—from Emma (@emmas_atelier). For the ‘Fun prompt’ of the #bpSewvember photo challenge, she posted a picture of the set Hudson Pants she made for Christmas. I found this very inspiring as I love sewing gifts and I love the Hudson pant.
You can read below how I did it!

Hudson pant True Bias

The Hudson Pant pattern

The Hudson Pant is a pattern for very comfortable sweatpants and there is a female, male and mini version of it. At that time I already sewed 5 Hudson pants—for my daughter, for my husband and for myself— so the pattern had no more secrets for me. I already made the necessary adjustments on these patterns: lengthening of the crotch line for my daughter and lengthening of the legs for all of us.
I traced new pattern pieces for the pants for my daughters-in-law. For my sons, I used the pattern of my husband with some extra length on the hems of the legs.

Hudson pant True Bias


The Hudson Pant Fabric

I bought 7 m of grey melée ‘sweatshirt fleece’ with a soft brushed inside at my local fabric shop. It’s a blend of cotton/polyester. Luckily for me, it was the end of the bolt so I got some more than 7 m and I needed it.

Hudson pant True Bias

The advantage of using the same fabric for all the Hudson pants is that you can really place your pattern pieces very economical. More, you can easily fit the smaller pieces in the leftover fabric after you’ve cut out the bigger pieces

Hudson pant True Bias


Sewing 7 Hudson Pants in a row

I had already the different measurements of everybody so I could cut out the pattern pieces. To make sure I didn’t forget any of them (8 pieces per pants makes 56 pieces in total!) I made a graph and I gave every pant a different colour. Because there was an obvious difference between the men’s and women’s pants I could use the same colour for the marks twice.

Hudson pant True Bias

I also put these marks on the wrong side of the pattern pieces.

Hudson pant True Bias

Then I followed the successive stages of the sewing instructions but I did each of them 7 times. I kept sure I always put the several “pants-in-construction” in the same order.

Hudson pant True Bias

I sewed everything with the overlocker. As I sewed already 5 Hudson pants before I had no problem at all with putting everything together.

Hudson PantA pile of “pants-in-construction” after sewing all the pocket pieces. You can see some of the pink and yellow marks.

Hudson pant True BiasAll the Hudson pants are the same except for my husband’s. He didn’t want leg cuffs.

The gift

When I gave the presents I was nervous of course but they were all surprised and happy. They all tried the pants immediately and alas one of the pants for my daughter-in-law was too small on the legs! I widened them with a black strap and now they are good. Unfortunately for her, it took me more than a year to do so.  I gave the too small pants to my godson and made a new one for my daughter-in-law. Can you imagine my horror when she tried it on it was again too small, although I adjusted the pattern. That’s why I fixed it with the black straps.

Hudson pant True Bias

Hudson pant True BiasThe ‘kids’ looking cool in their Hudson pant!

The mini-one

This whole story took place in 2017 but we never got together to make a picture with all of us wearing our Hudson pant. In the meanwhile, our grandson was born so I had to make matching pants for him! There is no Hudson pant pattern for babies so I took the Oliver pants pattern that I used before. But I used leftovers from the grey fabric and from the fabric that I used for the dress for his mama when she was still pregnant with him.

Hudson pant True Bias

Conclusion

My family and I, we love our matching Hudson pants. We all think they are very comfortable and we love wearing them.
Will I sew more Hudson Pants? I guess so because after the photoshoot my son asked me to sew him another one!

Bonus: the Hudson pant Photoshoot

Hudson pant True Bias

Hudson pant True Bias Hudson pant True Bias Hudson pant True Bias

Do the Hudson Dance!

Hudson Pant True Bias

The Kingfisher Top from The Sewing Revival

Sometimes a pattern just falls on your head! I blame @robinsnest1926 😉 . When she posted her first Kingfisher Top on Instagram I immediately wanted to sew one myself. The pattern ticked several of my boxes: the combination of a woven fabric with knit bindings, a deep neck, a loosely—but not too wide— fit and raglan sleeves. I love raglan sleeves!
So, I bought and downloaded the Kingfisher Top immediately. Alas, actually starting to sew the top took longer than expected.

Kingfisher Top Sewing Revival


The Kingfisher Top pattern

The Kingfisher Top is a pattern from the New Zealand indie pattern company The Sewing Revival. It was the first time I heard from them and I was pleasantly surprised by their offer of patterns in their webshop. So, I also bought the Tui Dress, since it was the beginning of September and still very warm. Optimistically, I thought I would still have enough time to sew that too!

Kingfisher Top Sewing Revival

I ordered the pattern on a weekend and I wanted to start sewing immediately so I printed the pattern tiles and glued them together. The marks on the pattern tiles were clear so this was a quick job.
The Kingfisher Top pattern consists of 3 basic pieces: the front, back, and the sleeves. Then there are the pieces for the neckband and the sleeve cuffs, both for the short and the 3/4 version. I like that you don’t have to draft the bindings yourself.
Based on the measurements on the size chart, I cut out the XL and didn’t make any adjustments. Although I like the fit, next time I maybe will grade down a size on the shoulder-arm part.


The Fabric

I bought this Italian silk at my favourite fabric stall at the market in Castel del Piano. It was a remnant so I had no other option than to make the top with short sleeves.
For the contrasting fabric, I used this black rib with bronze sparkles I still had in my stash. I used it for my second Juniper cardigan.

Kingfisher Top Sewing Revival


The sewing process

The sewing of the Kingfisher Top went smoothly without hiccups. The Sewing Revival gives it a 4/10 on the easy score and that’s a fair score.
The instructions are extensive with photos and illustrations. Not so much for me but very useful for a beginning sewist. This top came together in about two hours. First, I sewed all the seams on the overlocker. Then I machine basted (stitch length 5) the neckband and the cuffs and also finished them with the overlocker.


Kingfisher Top Sewing Revival


Conclusion

I think it’s obvious that I am happy with my Kingfisher Top. It’s a joy to sew and a joy to wear. I particularly love the feel and the drape of the silk. And I am lucky that we are now having these extremely sunny days here so I can wear it a lot!
Will I sew some more of this top. I guess you already know the answer. So thank you @robinsnest1926 for showing me the Kingfisher Top.

Kingfisher Top Sewing Revival

The faux wrap skirt from Knipmode

There are 1000 reasons to start sewing a new garment, aren’t there? Well, the sewing of this skirt started with an email of Knipmode. They offered me a discount on their patterns because they missed me. (It had been a while that I bought one of their patterns! Actually, the last time was in December 2016.) I know that this kind of emails is pure advertising but once in a while, I’m sensitive for this sort of stuff. So I visited the website and this skirt got my attention. It looks like a wrap skirt but it isn’t. It is a fitted skirt with an asymmetrical front flap fixed to the skirt with a loop.

faux wrap skirt

The Knipmode skirt pattern

The pdf-patterns from Knipmode have no A0-format so I printed and glued together 27 pages. The different lines and assembly notches are very clear thus that wasn’t a hard job!
The pattern consists of 7 pieces which are all on the printed pages.  You don’t have to draft some pieces yourself. I like that.  To save paper the extra front flap is drawn in two pieces.  You have to tape them together. Here also the assembly line is very clear.
Be aware that these pattern pieces come without seam allowances.

knipmode skirt

Based on the measurements on the size chart, I cut out a 50. I took the size of the waist as my guideline as the skirt is fitted. I lessened the curve of the hips with 2 cm and lengthened the hem by 5 cm.  This all turned out perfect when I fitted the skirt.

knipmode skirt

The fabric

I bought this beautiful Italian wool in February 2016 at the market in Castel Del Piano. It’s dark blue (very difficult to photograph) with a subtle light blue woven check.

Italian wool

I immediately thought about this fabric because the model of the skirt is in plaid. The only problem with these fabric pieces from the market in Castel del Piano is that they are remnants so you have to take the piece as they come. I had 1,28m on 1,50m and the instructions asked for 1,60m on 1,40m. You need even more if you want to use a print! But I managed. I could even cut out the front flap on the bias.

The sewing process

Knipmode gives the sewing of this skirt a difficulty level of 2,5 (on 4). In my opinion, this is a correct rating.
The instructions are compact and without illustrations. But luckily for me in Dutch, my native language. I didn’t have a lot of trouble to put the skirt together. The only point where I  had to read the instructions a few times is when you make the loop on the front piece.  Looking at the photo now it seems obvious.
knipmode skirt

knipmode skirt

knipmode skirt

Conclusion

I am very happy with my new Knipmode skirt. I love that it is a fitted skirt with this twist at the front. Although I sewed the skirt on the last day of Summer I think I can wear it easily with tights in Autumn.
Will I sew another one? I guess I will. In fact, I’m looking forward to it!

knipmode skirt

The Ali Sweatshirt from Sew DIY

Last Tuesday Sew DIY launched a new pattern: the Ali Sweatshirt. It’s a casual and comfy sweatshirt with some interesting design features. The design of the back yoke just asks for experimenting. I was one of the lucky sewists to test the pattern back in July.  Although it was high summer at that time, the testing was a joyful ride.

Ali Sweatshirt


The Ali Sweatshirt pattern

The Ali Sweatshirt comes in two versions: one with a crewneck a one with a scoop-neck. I choose view B, the scoop-neck. The pattern consists of 7 pieces. Based on my measurements I cut out the XL but in hindsight, I should have cut out the L because there is a lot of ease at the bust. I understand Beth updated the pattern now with more narrow sleeves.  I assume that I would prefer this option.
As usual,  I lengthened the bodice by 4 cm. This is easily done because of the lengthen/shorten line on the pattern piece.

Ali Sweatshirt


The red striped fabric

After sewing the maternity dress for my daughter-in-law I had still enough of this beautiful Red and White Stripe Cotton Knit from Girl Charlee UK. It’s soft and I had already experienced that, even though being a knit, that it behaved very well under the machine! This and the possibilities the stripes give for some experimenting with the placement of the back yoke, are the reasons why I choose this fabric. Because usually, I am so NOT a striped-garment-wearing person. I think my latest striped sweater dated from 1975!

Ali Sweatshirt


The sewing process

Sewing the Ali Sweatshirt is a joyful ride. Nearly all the seams are straight seams and Beth wrote very clear instructions. I sewed the sweater totally on my overlocker and I topstitched the seams on my regular machine with a walking foot and a very small zig-zag stitch.

The one thing of the construction that took some thinking was the chevron I had in my head for the back yoke. How did I do it?

  1. I drew a 45° line (the green one) on the pattern piece of the yoke. I transferred some of the red stripes on the pattern piece too. This would make it more easy to cut out the second part of the yoke.Ali Sweatshirt
  2. I cut out one piece of the yoke in a single layer.
    Then I transferred the 45° line and the red stripe marks to the back side of the pattern piece and checked the placement on the fabric.
    Ali Sweatshirt
  3. After, I put the already cut out piece with right sides together on the fabric to cut out the second piece of the yoke. I carefully matched the stripes.Ali Sweatshirt
  4. Then I basted the yoke and stitched it with my overlocker. For the topstitching, I used the small zig-zag stitch on my sewing machineAli Sweatshirt


I used the same procedure for the plaid Zéphyr dress I sewed for my daughter.


Conclusion

I love my Ali Sweatshirt. I already wore it a lot, especially on colder evenings when it makes me feel all comfy and cozy. I’m even wearing it now! If you are looking for an easy to sew sweatshirt where the pattern design still hands you some possibilities to give it a personal touch, don’t hesitate. There is a launch discount for this pattern until Sunday.

Ali Sweatshirt

Eye-catchers #20

An eye-catcher is a person or a thing that attracts the attention

The online sewing community is very visual. So, every day I see heaps of sewing related images on social media and blogs. Some of them catch my eye because they make me think or they give me inspiration. Here, I want to share these eye-catchers with you.

ideas for sewing


Follow below what caught my eye the last months:


Tiina’s Japanese Dress

Cotton Friend

Thanks to the fun summer photo challenge #sewingagogo I discovered this beautiful dress made by Tiina.  It’s a pattern from the Japanese sewing magazine Cotton Friend. I was immediately attracted by the sharp design of the front. The instructions are only in Japanese but apparently well illustrated. So far I’ve never sewed a Japanese pattern but this dress really inspires me to give it a try.


The Frances top from @maxantonia

Frances Top

The simple line of the design of this top combined with the remarkable finish of the sleeves immediately caught my attention. I love this version by @maxantonia in blush pink cupro. Also, this Frances top is a free pattern from Fibre Mood, a new pattern book/magazine company. Once you register you can download it and more, the instructions are available in 4 languages (Dutch, French, English & German).  When I searched through the site some more I discovered Fibre Mood is stationed in my town. It’s always great to discover some sewing souls in the neighbourhood.


Beck’s Kabuki Tee
Kabuki Tee

When you don’t have enough fabric but you’ve got your mind set on using this specific fabric for the pattern you want to sew; you have to go right to the limit. That is what Beck did with the Kabuki Tee from Paper Theory. The result is stunning and totally my thing. The way Beck placed the fabric accentuates the absolute crisp design of the Kabuki Tee. Look at these square shoulders! I was so in awe that I immediately started sewing a Kabuki Tee myself and designated Beck as my Sew Style Hero.


The Kobe top made by @katilulemakes

Kobe Top Patercut

When you look at the front of the Kobe top from Papercut patterns you may think it’s a classic top, but the back gives away the unexpected and stunning design. I was instantly taken by this version by @katilulemakes. A perfect combination of fabric and pattern! Maybe I could still make one for these warm fall days that are coming…


@sewingblue’s sewing

ideas for sewing

@sewingblue is a Swedish sewist who I admire tremendously. She has great sewing skills and everytime she posts on Instagram I am totally in awe. So I was not surprised when I read the capture of this photo that it told the story of a great—and yet new for me—sewing technique. It’s about a clear finish on the inside. She uses a seam allowance of 2,5 cm. After stitching the seams the seam allowance is folden and then stitched to the body about 1 cm from the seam. You will see the stitching on the bodice but this gives also a neat effect. Hats off for this kind of sewing!

So, did anything catch your eye recently?

The Magenta Ogden Cami from True Bias that took forever to sew!

Well, I wasn’t going to sew a new Ogden Cami this summer; I sewed already three versions (cami, maxi dress & dress) last summer. I even didn’t bring the pattern with me to our holiday house. Then I went home for four days to celebrate my mother’s 80th birthday and—never not sewing—started sewing the presents for a sweet little girl that was just born. In my search through my fabric collection for suitable fabric for the baby, I stumbled on this piece of magenta leftover. I don’t know what its origin is, or its composition because I must have had it for more than 25 years. When I held the fabric in my hands it said: “I’m perfect for an Ogden Cami!” And so another Ogden Cami jumped to the pole position of my sewing queue.  I grabbed the pattern and put it with the fabric in my luggage back to Italy. This was going to be a sew for maximum 3 hours, I thought. Man, was I wrong!

Ogden Cami True Bias

The magenta fabric

Like I said above: I don’t know the origin and the composition of this fabric. I found two pieces in my collection: one small part with cutouts from a small waistband and a bigger part of 65 cm on a width of 114cm. The fabric has a medium weight and some drape. Perfect for an Ogden Cami!

Ogden Cami

The sewing struggle
Struggle #1 Not enough fabric

When I decided to make the Ogden Cami I roughly put the pattern on the fabric and thought I could fit it. Alas, after trying several placements I had to admit that the piece wasn’t big enough.

Ogden Cami

But no worries! I had a good experience with the self-made striped lining for my Jill Coat so I could expand the fabric with some fabric straps. When I browsed my bags of fabric I saw the leftovers of my sheer Venus Kimono. The selvedge of this fabric has these strange stripes which I found perfect.Ogden Cami

My work order to expand fabric
  1. Cut out the back piece as economical as possible.
  2. Cut the remaining piece of fabric in two.
    Ogden Cami
  3. Assemble all the fabric pieces together to make one strap. Here I made a mistake to match the top of the first strap with the lowest point of the neckline. When I did a test placement of the pattern I noticed that because of that I had not enough fabric for the hem. I tried to unpick the strip but I used a small zigzag stitch to prevent fraying.  Needless to say that trying to unpick was hopeless.
    Ogden Cami
  4. Make a patchwork with small scraps so you have a perfect rectangle.
    Ogden Cami
  5. Stitch the strap to both sides of the line you cut. Cut out the front bodice. Tadaa!
    Ogden Cami
Struggle #2 The bias binding

As I squeezed the bodice out of the small amount of fabric I had, you can imagine there was absolutely nothing left for the lining. No worries! I’ll finish the neckline and armholes with self-made bias tape! That would be easy, because I had my bias tape maker with me. I succeeded in cutting out two squares of 14 cm of the magenta fabric and one square of 15 cm of the sheer fabric. Of course, I wanted the bias tape to match with the fabric of the bodice. bias binding

Although I’ve made continuous bias tape before, I struggled a lot with these small pieces and I just didn’t see how I had to make the loop. Also, due to their fluidity and devilish character both fabrics were very difficult to put marks on. So I made a sample in tissue paper and then the light went on.bias binding

Sewing the first line of the bias tape on the bodice went smoothly. For finishing the v-neck with bias binding I used the little dart technique that I learned sewing my Chari Dress.bias binding

The second part of the bias binding finish, the fold over, was hell! Because of the small squares of fabric I used there were a lot of tiny seams in the bias tape. And again, these fabrics—although starched— wouldn’t let themselves fold. So I basted the more tricky parts. This made it easier to sew the folded over bias tape.Ogden Cami

Then finally I could hem the bodice. I couldn’t believe that this Ogden Cami was finished. It was a 4-days journey!

Ogden Cami

Conclusion

Am I happy with my Magenta Ogden Cami? You may think I am not but I am! Since I finished it I wore it non-stop and I love wearing it. Just like my other Ogdens, this is a perfect wear for these hot days. Will I sew more Ogden Camis? I guess the answer is no but you’ll never know when I find another piece of fabric that talks me into it!


The Statement Dress: the Zéphyr dress from Deer&Doe in Black Red Buffalo Plaid

On an afternoon a few months ago my daughter and I were browsing the internet in search of a dress pattern that she would love. We came across the Zéphyr dress from Deer&Doe and my daughter immediately liked the design of it. Because of a fitted bodice, a v-neck, a loose-fitting skirt and a sexy vibe, it ticked all of her boxes. When I saw the pattern was designed for knits I said to my daughter: “If we make it out of the Black Red Buffalo Plaid we have then it is a statement dress!” As we both are never shy about making a statement we went for it and we are both super excited about it!

Zéphyr Dress

The Zéphyr Dress pattern

The Zéphyr Dress pattern from Deer&Doe, version B, consists of 7 pieces. Based on the finished garment measurements in the instructions, I cut out the biggest size. I found it a pity though that in the English instructions the measurements are only in inches as I’m using the metric system. After conversion, I noticed I had to expand the waist with 16 cm. First,  I divided this width evenly on the waist hem of every piece of the bodice and graded to the bust or arm. Second, I broadened the skirt pattern by 4 cm in the middle of the pattern.
Further, I lengthened the bodice with 1 cm and the skirt with 5 cm. That was the maximum the length of my fabric allowed. All of the adjustments were perfect!

Zéphyr Dress
Perfect body length, perfect skirt length and perfect fit of the waist! And look at that pattern matching at the centre of the bodice and the skirt!
The Black Red Buffalo Plaid fabric

The Black Red Buffalo Plaid fabric is a cotton spandex knit from Girl Charlee. My daughter chose it a few months ago because she wanted some garment of plaid. It’s a nice fabric to work with. It has some body, good recovery, and the needed 40% elasticity.
Though two things made the cutting of the pattern a little tricky, being a knit fabric and the lines of the plaid. I solved this by cutting open, with a single layer of fabric. It’s the same technique I used for my striped Nanöo Top.

Zephyr Dress
Cutting open in a single layer of fabric.

Zephyr Dress
I’m using the already cut pattern piece of the skirt to cut out the second. The slightly visible black lines on the back of the fabric help to make the pattern match.

One of the perks of this black red plaid is that you can create chevrons! The fabric asks for a single layer cutting so you can place your pattern pieces meticulous to make these chevrons.

The sewing process

The Zephyr Dress comes together easily. Deer&Doe wrote clear instructions with crisp designs.  Though I didn’t follow them for 100%.
As my daughter was going to fit the bodice several times I first staystitched the neckline to prevent stretching. I didn’t make a muslin but I basted, with a large stitch on the sewing machine, the bodice with an extra 1 cm seam allowance on al the seams. I once read this and remembered it as a tip for sewing for curvy women. Probably it was a tip from Jenny from Cashmerette.
After the first fit, it was clear that the extra seam allowance was not necessary. So I finished the bodice on my overlocker using a 2 cm seam allowance and rainbow thread!


Zephyr Dress
The neckline is staystitched and I reinforced the v-neck with some lightweight interface.

Because a single bodice is easier to handle than a complete dress I first sewed the armholes and the neckline. For the armhole and neck binding, I used some of the extra red fabric that was on the selvedge side. It was my first v-neckline in a knit fabric and therefore the instructions of Deer&Doe were not extensive enough. So I searched on the web and found a good tutorial from Grainline Studio and it worked out fine!
The last thing to do was matching the skirt with the bodice and tadaa! The statement dress was ready!

Conclusion

Do I still have to say that we are over the moon with this Zéphyr Dress? I think the pictures speak for themselves. Will I sew more Zéphyr Dresses? I probably will. I’m so glad I could adjust this pattern for a perfect fit that I absolutely want to sew it again.

Bonus!

It is totally a coincidence that the three patterns from Deer&Doe I sewed so far are all red!

Zephyr Dress
Zéphyr Dress                                     Sureau Dress                                     Givre Matternity Dress

A tale of two Venus Kimonos

When I restyled a summer dress to a kimono a few weeks ago I absolutely wanted to sew one for myself. I already had the perfect fabric in mind for it. Then I went to the market in Castel del Piano and I found some nice remnant pieces of fabric at my favourite stall. One of them eminently suitable for a kimono. So the only thing to do was to sew two Venus Kimonos in two days!

Venus Kimono


Venus Kimono #1 in African Wax Cotton

I got this fabulous—but impossible to photograph—piece of African Wax as a present from my sister-in-law. I don’t know where it came from or what its origin is but it has some vintage vibe. The piece was 1,80 m by 1,40 width.  I was intrigued by the design and I wanted to use as much of it as possible. African Wax

Therefore I placed the shoulders of the front and back in the middle of the fabric and lengthened both the front and the back, until the borders. Just like the restyled kimono, I made before, I put the back at the centrefold, after folding over the seam allowance of 12 mm.
The front pattern was too big for the width of the fabric so I cut off 21 cm at the arms and placed these pieces at the selvedge. This gave me more of the fabric design on my kimono and the selvedge didn’t need hemming!

Venus Kimono
The back of the kimono with the beautiful design.
Venus Kimono
The front with the design in the middle and the borders on the sleeves.
Venus Kimono #2 in sheer flower fabric

When I touched this fabric at the market I knew immediately it would be perfect for a kimono: light, fluid and drapey. The only problem with this kind of fabric is that it is devilish to work with.

Sheer FabricSo, I treated it with starch to make it easier to cut and sew. And it worked! I didn’t have a single problem.Using starch

A small pattern hack

The sheer fabric was 1,65 m on a 1,50 with. I wanted a longer kimono so I lengthed the front and the back at the side seams with 35 cm and redrafted the hem.Venus Kimono

Venus Kimono
The lengthened kimono.
The Sewing Proces

It’s not difficult to sew the Venus Kimono. Annie, from Sew This Pattern,  has a detailed sew-along on her website with clear instructions and pictures.
The next three steps made it even easier for me.

#1 The 1/4 inch presser foot

1/4 presser footFor me, a 1/4 inch presser foot is an unmissable guide for sewing french seams. Here you see that I use some tissue paper for the start of a seam of fragile fabric.

#2 A stitched line to prepare the rolled hem

rolled hemThis I do slightly different than shown in the sew-along. I stitch a line 1/4 inch from the edge of the hem.

rolled hemThen I fold the fabric on the stitched line and press. Next, I fold the fabric again 1/4 inch and sew the hem at 1/4 inch. Here again, the 1/4 inch presser foot is unmissable.

rolled hem

#3 Basting the curves of the rolled hem

bastingWith my first Venus Kimono, I had trouble with the rolled hem at the neckline so I finished it with bias tape. For these two kimonos, I followed Annie’s advice and basted the curved neckline. And I learned that basting isn’t slowing your sewing process but in fact skilling it up.

Venus Kimono

Conclusion

Do I love my new Venus Kimonos? I do! Do I have a favourite? No, I don’t. It’s difficult to choose one because both are different in style and in how they feel. Will I sew more Venus Kimonos? Not in the near future but you all know: never say never!

Venus Kimono


P.S. All the time when I was sewing these Venus Kimonos I was singing Venus from Shocking blue. This song is a huge teenage memory. The strangest thing is, that when you look at the video, Mariska Veeres is wearing some kind of Kimono.


Summer Sewing at Podere Santa Pia

Exactly today 10 years ago we bought a holiday house—Podere Santa Pia—in the south of Tuscany, the Maremma. No need to say that this is our heaven on earth and we don’t regret this investment for one second! Of course, we try to go there as much as my school schedule allows. My husband is self-employed and can take his work with him wherever he goes. So, we are staying here for at least 8 weeks during the long summer break. This also means that I have to organise 8 weeks of sewing in advance. How can that be done? Below, you can read the story of a summer of sewing at Podere Santa Pia.

sewing at Podere Santa Pia

What do I bring with me?
1. My sewing machines

Ten years ago I was in a non-sewing-period and my sewing machine was gathering dust somewhere back in the attic. So, when we bought Podere Santa Pia there was no urgent need for a sewing space there. This changed in September 2013, when I started sewing again and enjoyed it so much that I wanted to sew all the time. Including when on holiday; maybe especially when I was on holiday because then I had time for it. That’s why I brought my trusted Toyota sewing machine and some projects with me. The start of a new tradition.

Sewing at Podere Santa Pia
July 2014, first time sewing on the terrace of Podere Santa Pia. I’m sewing a swimsuit.

It’s 1444 km between our two houses and it takes about 16 hours to drive there. Luckily, our car has a huge boot to take all my sewing luggage with me.
After buying a new sewing machine on Easter 2015, I left my Toyota sewing machine permanently at Podere Santa Pia. This is handy for when we come by plane. We fly when we have a short break. Then I only bring with my special sewing feet:  the walking foot and 1/4 inch foot. I didn’t research it when I bought a new machine but my two sewing machines have the same foot mechanism. Very handy.
I still bring my overlocker though. Especial this summer as I want to sew a lot of knit projects.

Sewing at Podere Santa Pia
The sewing machines on the desk I use as a sewing table.
Sewing at Podere Santa Pia
The sewing luggage: my overlocker, baskets and bags with fabric, a box of WIPs, a roll of A0 printed pdf patterns and a bag of sewing notions.
2. Sewing materials

Of course, you need more than a sewing machine to sew. So a few days before we leave I  make a list of all the projects I want to sew and I make a list of all the materials I need: fabric, zippers, lining, interfacing, buttons, etc…  It is necessary that I bring this all with me because there are no specialised sewing shops in the neighbourhood. Podere Santa Pia is situated in a quiet and rural area and the nearest small sewing shop is in Castel del Piano, about 30 minutes away.  In this village, there is also a monthly market with a fabric and haberdashery stall. Luckily this exists, because last year I had not brought enough fabric for the Laminaria Swimsuit and I found suitable fabric at this market.

Sewing at Podere Santa Pia
Selecting fabric at the market in Castel del Piano.
Sewing at Podere Santa Pia
Cute haberdashery stall at the market at Castel del Piano
The drawer with notions and supplies I collected last 3 years.
What do I want to sew this summer?
1. Finish some WIPs!

First of all, I want to finish some WIPs. I have several projects I started last year, or even before that,  but didn’t finish.

  • Boxers for my sons and husband.

It’s the Jalie 2326 pattern. All of them are cut out, most of the side seams and flies are sewed. They just need hemming and elastic put in.

  • The Highlands Wrap Dress

Oops, this was supposed to be my entry for #sewtogetherforsummer this year.  Again I didn’t make the deadline. I cut out all the pieces—and there were a lot—I just have to sew it together!

I cut out this pattern of the leftovers I had from the Cashmerette Turner Dress.

2. New projects
  • Sewing for babies

We are expecting two new babies in our family this summer and one of them is going to be our first grandson. So I brought with me some cute fabric to sew some presents for these little ones.

  • New garments

Starting at the top:
– African wax for a Venus Kimono for myself.
– African wax for a second V9075 Jumpsuit.
– Black linen for comfy trousers for my husband.
– Polka dots for the Dartmouth Top for my daughter.
– Red & Black plaid for the Zéphyr Dress from Deer&Doe for my daughter.

  • Testing a sweater pattern

I had to bring several medium heavy knits to test a sweater pattern. I can’t tell you more at this moment.

  • 2018MakeNine

I also brought the patterns and fabric with me for two items of my 2018MakeNine: the Jenna cardi and the Watson bra. In fact, they were on my 2016 and 2017MakeNine too. Will I sew them this summer?

  • The Ellsworth Coat

Sewing at Podere Santa Pia


At the end of the summer, I want to start on the Ellsworth Coat from Christine Haynes. I have the pattern, in A0 format, and I have this beautiful, red, vintage, heavy cotton. This coat is also on my 2018MakeNine.

Conclusion

So this is how I sew during the summer at our holiday house, Podere Santa Pia. What do you think of my sewing plans? A little too ambitious? I will let you know at the end of August!

Do you travel with sewing luggage?